Musculoskeletal Disorders Take a Mental Toll

Musculoskeletal Disorders | How Muscle Injuries Take a Mental Toll

Musculoskeletal Disorders WorkSAFE Podcast

What is a Musculoskeletal Disorder?

Musculoskeletal disorders (MSDs) affect certain areas of the body. This includes muscles, tendons, ligaments, cartilage, joints, nerves and spinal discs. The Occupational Safety and Health Administration (OSHA) divides MSDs into two categories: illness and injury. An injury happens when a worker can identify a time or date, they started to have pain. For example, pulling a muscle while lifting a heavy box.
Illnesses are harder to pin down. An illness is more insidious and onset. You can’t really figure out when exactly it happened. For many, it starts as simple soreness or a twinge of pain. Over time, the pain gets worse. This is often triggered by repetitive motion. Today, ergonomics professionals call this a slow progression cumulative trauma disorder, or musculoskeletal disorder illness.

5 Factors that Contribute to Musculoskeletal Disorders

There are five factors that contribute to musculoskeletal disorders. These actions or movements are done often in the workplace. Eventually, they can lead to injury and illness. Pain begins when employees do the following motions:

  1. Repetition. This is classified as frequency and speed over time. If you are doing something more than twice a minute, then it can be called repetitive. 
  2. Force. This includes gripping, pinching, lifting, carrying, pushing and pulling. 
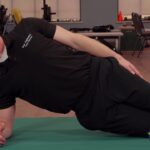
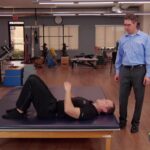
  3. Posture. Awkward posture, or holding the same position for a long time, are MSD risk factors. 
  4. Contact stress. Sudden impact, or sustained pressure, on certain parts of the body can create strain.
  5. Vibration. There are two types of vibration: whole body and segmental hand-arm. Whole body is caused by moving floors, or activities like driving a machine. Segmental hand-arm occurs often through, like pneumatics guns or sanders.

A single factor isn’t likely to cause injury. Just one alone isn’t going to cause you to have a disorder. It’s usually a combination and from my experience, it’s usually three – when you get three of these risk factors together. For example, posture, force and repetition are the greatest factors in shoulder injuries. However, posture, force and vibration contribute the most to back injuries. 

Improper vs Proper Lift

Improper vs Proper Lift | Early Intervention Ergonomics

Improper Lift vs Proper Lifting Technique

What we want to demonstrate here is that this is an improper lift, and this is an improper lift for several different reasons. The first reason that I would say is with his back fully curved, he doesn’t have the opportunity to disperse the weight of what he’s getting ready to lift. We also notice that he has a significant amount of hip flexion. And his knees are also straight. Another problem is the fact that the load is too far out in front of him.

As he gets ready to lift, he’s going to be in a secondary zone, another improper lift. That we see on a regular basis is the traditional squat lift. In the traditional squat lift position, you can see that his back is now more protected because his spine is nice and straight, but he has a significant amount of bend. At both his hips and his knees, if we continue to look down just a little bit further, you’ll see that he’s up on the balls of his feet. He has no base of support and again the load is out in front of him as he’s getting ready to lift. When he comes up, he’s in the secondary zone as well.

The Stance We Like to Teach

What we like to teach is the wide stance, power lift position. In this position what you notice is that his back is nice and straight. The bend is split between both his hips and his knees with his feet staggered. The weight that he’s getting ready to lift is fully inside his base of support. As a result, both his hips, his legs and his back are doing the lifting.

Early Intervention Benefits of Proper Lifting

Using proper lifting techniques can provide several early intervention benefits, including:

  • Injury Prevention: One of the primary benefits of using proper lifting techniques is the prevention of injuries. Lifting heavy objects incorrectly can lead to strains, sprains, muscle tears, and other musculoskeletal injuries. By employing proper techniques, you can reduce the risk of these injuries and maintain a healthy, pain-free body.
  • Reduced Back Pain: Improper lifting is a common cause of back pain. Using the correct lifting techniques helps to minimize stress on the back muscles, discs, and ligaments, which can alleviate or prevent back pain. By distributing the load properly and engaging the larger muscles of the legs and core, you can protect your back from unnecessary strain.
  • Increased Strength and Efficiency: Proper lifting techniques involve utilizing the body’s strongest muscles and maintaining good posture. By engaging the legs, hips, and core muscles, you can generate more power and lift heavier objects with greater ease. This not only increases your strength but also allows you to perform tasks more efficiently and with less fatigue.
  • Improved Balance and Stability: Correct lifting techniques emphasize maintaining a stable and balanced position throughout the lift. This helps to improve your overall balance and stability, reducing the risk of falls or accidents during lifting activities. By developing better body control, you can enhance your overall coordination and stability in various daily activities.
  • Enhanced Posture and Alignment: Proper lifting techniques promote proper body alignment and posture, both during the lift and in everyday life. By maintaining a neutral spine, keeping the shoulders back, and engaging the core, you can improve your overall posture. This can reduce the strain on your spine, alleviate muscle imbalances, and contribute to better overall musculoskeletal health.
  • Increased Work Productivity: When you lift objects using proper techniques, you maximize your efficiency and minimize wasted effort. By utilizing the appropriate muscles and maintaining good form, you can complete tasks more quickly and effectively. This can lead to increased productivity, especially when lifting objects regularly or in physically demanding occupations.

Things to Remember

Learning and practicing proper lifting techniques can provide you with valuable skills that extend beyond lifting heavy objects. The principles of proper body mechanics, such as maintaining good posture, engaging the core, and using the legs, can be applied to various activities and movements in daily life. These skills can help you avoid injuries and perform tasks more efficiently in different contexts.

Remember, it’s always important to consider the specific requirements of the lifting task, seek assistance when needed, and listen to your body’s limits to ensure safe and effective lifting practices.

These early intervention exercises are to help reduce work-related injuries, and to improve overall health & fitness.

Contact us today for more information on how we can help you reduce work-related injuries throughout your organization.

If you have an injury or illness, consult with a health care professional before attempting.  

More Tools & Resources from Peak Ergonomics
Contact Us About Reducing Workplace Injuries
Healthy Employees are the Bottom Line! – Learn More!

Improper vs proper lift of heavy objects incorrectly can lead to strains, sprains, muscle tears, and other musculoskeletal injuries.


Golfer’s Lift

Golfer’s Lift  |  Early Intervention Ergonomics

What is the Golfer’s Lift?

The Golfer’s Lift is a technique that allows you to safely pick up small objects from the ground with minimal stress to the lumbar spine. It is important to note that this lift should NEVER be used for objects that weigh more than 5 lbs (equal to a half gallon of milk).

This lift is also known as the “pendulum” technique used for picking up small objects safely from the ground. It involves using a stable surface (like a chair) for proper balance or bridging as you perform the lift. First, you swing your leg back, using it to counter-balance your torso as you lower yourself down. Then, you swing it forward gently as you raise yourself back up. This technique is easier on your back and won’t cause the same wear and tear as bending from the back.

Another method is to use a golf club or other long object. Place the shaft of the club under the ball and lift it. You can also use the club to push the ball towards you to pick it up with your hand.

The important thing to remember is to make sure you are keeping a neutral spine as you are bending over to pick up the object. Always remember to bridge yourself as you are performing this lift in order to protect your back.

Early Intervention Benefits

Maintaining neutral spine when lifting small objects from the ground has numerous early intervention benefits. Here are some key advantages:

  1. Spinal Alignment: Maintaining a neutral spine helps to ensure proper alignment of the vertebrae, reducing the risk of excessive stress or strain on the spine. It allows for even distribution of weight and minimizes the chance of injury to the back.
  2. Injury Prevention: Lifting with a neutral spine helps prevent injuries such as muscle strains, herniated discs, or ligament sprains. Maintaining the natural curves of the spine evenly distributes the load, reducing pressure on specific areas and minimizing the risk of acute or chronic injuries.
  3. Core Stability: A neutral spine position engages the core muscles, including the deep abdominals and back muscles. These muscles act as a support system for the spine, providing stability and protection during lifting movements. Strengthening the core muscles through proper lifting technique can help improve overall strength and stability in daily activities.
  4. Improved Balance and Coordination: Keeping a neutral spine while lifting small objects enhances balance and coordination. It allows for better control of the body’s movement and helps maintain a stable base of support. This is particularly important when lifting objects that may be unstable or require precise control.
  5. Efficient Force Transfer: When the spine is in a neutral position, force can be transferred more efficiently from the lower body to the upper body and vice versa. This ensures that the energy generated during lifting is used effectively, reducing the strain on individual muscles or joints.

Things to Remember

It’s important to note that these benefits apply to lifting small objects from the ground, but they also extend to other lifting activities and even general movement and posture throughout the day. Developing proper lifting techniques and maintaining a neutral spine can contribute to a healthier spine, reduced risk of injury, and improved overall physical well-being.

These lifting techniques are to improve overall health & fitness as well as reduce work-related injuries.
If you have an injury or illness, consult with a health care professional before attempting.

Contact us for more information on how we can help your employees stay safe. Healthy Employees ARE the Bottom Line!

More Tools & Resources from Peak Ergonomics
Contact Us About Reducing Workplace Injuries
Healthy Employees are the Bottom Line! – Learn More!

Golfers Lift is a technique that allows you to safely pick up small objects from the ground with minimal stress to the lumbar spine.


Back Stretches

Back Stretches  |  Early Intervention Ergonomics

What are Back Stretches?

Back stretches are exercises or movements specifically designed to stretch and elongate the muscles and soft tissues in the back. These stretches help improve flexibility, relieve muscle tension, and reduce the risk of back pain and injury. Back stretches target various areas of the back, including the lower back (lumbar region), upper back (thoracic region), and the muscles along the sides of the spine.

Back stretches can involve bending, twisting, and elongating the spine, as well as stretching the surrounding muscles and connective tissues. They may be performed in standing, sitting, or lying positions, depending on the specific stretch.

These stretches as shown in the video above, replenish nutrients and re-oxygenate the structures of the back. Perform these stretches to give your body a rest when performing activities that involve awkward postures of the back, such as bending forward, bending backward, side bending, or twisting. These are also good to do after prolonged sitting.

Early Intervention Benefits

Regularly incorporating back stretches into your routine can have several early intervention benefits, such as:

  • Increasing flexibility: Stretching helps improve the range of motion in your back, making everyday movements easier and reducing the risk of muscle strains.
  • Relieving muscle tension: Back stretches help relax and release tension in the muscles of the back, reducing stiffness and promoting relaxation.
  • Improving posture: Stretching the muscles in the back can help lengthen tight muscles and strengthen weak ones, leading to better posture and spinal alignment.
  • Promoting spinal health: Back stretches can help maintain the health and mobility of the spine by reducing the risk of disc compression and promoting optimal spinal alignment.
  • Preventing back pain and injury: Regular back stretching can help prevent muscle imbalances, strain, and injuries, particularly in people who have sedentary lifestyles or perform repetitive tasks that strain the back.

Things to Remember

Remember to perform back stretches in a controlled and gradual manner, avoiding any sudden or jerky movements. It’s essential to listen to your body and not push beyond your comfort level or into pain. If you have any pre-existing back conditions or concerns, it’s advisable to consult with a healthcare professional or a physical therapist before starting a new stretching routine. These early intervention exercises are to improve overall health & fitness as well as help reduce work-related injuries.

If you have an injury or illness, consult with a health care professional before attempting.

Contact us for more information on how we can help your employees stay safe. Healthy Employees ARE the Bottom Line!

Resources

More Tools & Resources from Peak Ergonomics
Contact Us About Reducing Workplace Injuries
Healthy Employees are the Bottom Line! – Learn More!

Back stretches can help muscle imbalances, strains, and injuries, in people who have work-related repetitive tasks that can strain the back.


Posture Correction

Posture Correction | Early Intervention Ergonomics

What is the Posture Correction Exercise?

This is a dynamic active stretch to correct the top two poor posture habits of forward head and rounded shoulders. Proper posturing of the neck and shoulders opens the vascular and nervous system to replenish nutrients and re-oxygenate upper extremity. Perform this stretch to give your body rest when performing forceful gripping, repetitive gripping, awkward or sustained postures of the elbow, forearm, wrist, and hand to prevent common disorders such as tennis elbow, golfer’s elbow, carpal tunnel syndrome, trigger finger, tendinitis, tendinosis, and muscle strain.

The first step in the posture correction exercise is to put your hands across your forehead. The next thing I want you to do is take a good deep breath and as you exhale, pull the hands apart away from your head, squeezing the shoulder blades, rotating the palms away, pushing all the way out and down. Be sure to keep your chin tucked in while performing this exercise.

Early Intervention Benefits of this Exercise

The Posture Correction Exercise offers several early intervention health benefits for your posture and upper body:

  • Posture Improvement: The shoulder blade squeeze helps counteract the forward rounding of the shoulders, which is a common issue due to poor posture and prolonged sitting. By strengthening the muscles that retract and stabilize the shoulder blades, such as the rhomboids and middle trapezius, this exercise promotes a more upright and aligned posture.
  • Upper Back Strengthening: The posture correction stretch targets the muscles of the upper back, including the rhomboids, middle and lower trapezius, and rear deltoids. Regularly performing this exercise can help strengthen these muscles, improving their endurance and overall strength.
  • Shoulder Stability: This exercise promotes better shoulder stability by engaging the muscles that control scapular movement. Strong and stable shoulder blades provide a solid foundation for optimal shoulder function, reducing the risk of shoulder injuries and improving overall upper body strength.
  • Neck and Upper Back Tension Relief: It helps alleviate tension and discomfort in the neck and upper back region. By retracting the shoulder blades, it counteracts the forward head posture and tightness in the neck and upper trapezius muscles often associated with prolonged sitting or poor posture.
  • Improved Breathing Mechanics: When your shoulder blades are properly aligned and engaged, it opens up the chest and allows for better expansion of the ribcage during breathing. This can enhance your breathing mechanics and increase the efficiency of your respiratory system.

It’s important to note that while the posture correction exercise offers these benefits, it should be performed in conjunction with a well-rounded exercise program that addresses overall posture, strength, and flexibility.

These early intervention exercises are to improve overall health and fitness and reduce injuries.

If you have an injury or illness, consult with a health care professional before attempting.

Posture correction promotes a more upright and aligned posture by targeting two poor posture habits of forward head & rounded shoulders.


Toe Scrunches

Toe Scrunches


What are Toe Scrunches?

Toe scrunches are a simple foot exercise that involves scrunching or curling your toes towards the sole of your foot, and then releasing them. This exercise helps to strengthen the muscles in your feet, which can improve balance, stability, and overall foot health. It is a low-impact exercise that can be done virtually anywhere, and is often recommended for people who spend a lot of time on their feet or who suffer from foot pain or discomfort. To perform this exercise, simply sit in a comfortable position with your feet flat on the floor, and then curl your toes towards your sole, hold for a few seconds, and then release. Repeat this exercise several times a day for best results.

Early Intervention Benefits of this Stretch

Toe scrunches offer several potential health benefits, including:

  • Strengthening the muscles in the feet: this exercise can help to strengthen the small muscles in the feet that are often neglected in regular exercise routines. Stronger foot muscles can improve balance, stability, and overall foot health.
  • Improving flexibility: it can help to improve the flexibility of the toes and the arches of the feet. This can help to reduce the risk of foot injuries and improve athletic performance.
  • Reducing the risk of foot problems: Regularly performing toe scrunches can help to prevent common foot problems such as plantar fasciitis, metatarsalgia, and Morton’s neuroma.
  • Promoting circulation: Toe scrunches can help to promote circulation in the feet, which can reduce swelling and inflammation.
  • Enhancing overall foot health: By strengthening the muscles, improving flexibility, and promoting circulation, toe scrunches can contribute to overall foot health and comfort.

It is important to note that while this can be a beneficial exercise for many people, it is important to consult with a healthcare provider if you have any underlying foot conditions or concerns.

These Early Intervention exercises are to improve health and fitness.
If you have an injury or illness, consult with a health care professional before attempting.

More Tools & Resources from Peak Ergonomics
Contact Us About Reducing Workplace Injuries
Healthy Employees are the Bottom Line! – Learn More!

Toe scrunches are a simple foot exercise that involves scrunching or curling your toes towards the sole of your foot, and then releasing them.


Passive Flexor Tendon Stretch

Passive Flexor Tendon Stretch | Early Intervention Ergonomics

What is the Passive Flexor Tendon Stretch?

This advanced stretch replenishes the nutrients and re-oxygenates the distal upper extremity. It is a composite stretch that originates at the common wrist flexor tendon of the medial epicondyle and pulls all the way down to the deep and superficial tendons that pass through the annular pulleys of the fingers. Perform this stretch to give your body rest when performing forceful gripping, repetitive gripping, awkward or sustained postures of the elbow, forearm, wrist, and hand to prevent common disorders such as golfer’s elbow, carpal tunnel syndrome, trigger finger, tendinitis, tendinosis, and muscle strain.

Here’s how to perform the passive flexor tendon stretch:

  1. Bend at the elbow and extend your fingers so that they are straight and pointing away from your body.
  2. With your other hand, grasp a little bit of your palm and gently pull your hand down into a slight stretch.
  3. Slowly start to push your arm out, going as far as you can without pain and hold for 3-5 seconds.
  4. Repeat on the other side, feeling a stretch along your flexor muscles.

Early Intervention Benefits

Here are some key early intervention health benefits to this stretch:

  • Improved Flexibility: Regularly stretching the wrist flexor tendons can help improve their flexibility and range of motion. This makes it easier to perform various activities that involve flexion and extension of the wrist and fingers.
  • Injury Prevention: Tightness or imbalances in the wrist flexor tendons can increase the risk of overuse injuries such as tendonitis or repetitive strain injuries (RSIs). Stretching these tendons helps maintain their flexibility, reducing the likelihood of developing these types of injuries.
  • Reduced Muscle Tension: The repetitive motions and sustained postures involved in many work-related tasks, such as typing or using handheld devices, can lead to muscle tension and discomfort in the wrist flexor muscles. Stretching these muscles and tendons can help alleviate this tension, promoting relaxation and reducing the risk of chronic pain or muscle imbalances.
  • Improved Blood Circulation: Stretching exercises, including the wrist flexor tendon stretch, can improve blood circulation to the forearm and hand. Adequate blood flow ensures that the muscles and tendons receive essential nutrients and oxygen, promoting their health and recovery.
  • Enhanced Ergonomics: Incorporating wrist flexor tendon stretches into a regular stretching routine can contribute to better ergonomics in the workplace. Workers may experience improved posture and decreased strain on the wrist and hand during repetitive tasks.
  • Stress Relief: Engaging in stretching exercises can have a positive impact on overall stress levels and mental well-being. Taking short breaks to perform wrist flexor tendon stretches can help reduce mental and physical stress associated with prolonged or repetitive work tasks.

Things to Remember

It’s important to perform this stretch with control and avoid any jerking or sudden movements. You should feel a gentle pulling sensation in the forearm and wrist area, but the stretch should not be painful. If you experience pain or discomfort, ease off the stretch or consult with a healthcare professional.

These early intervention exercises are to improve overall health & fitness as well as reduce and prevent work-related injuries.  If you have an injury or illness, please consult with a health care professional before attempting.

More Tools & Resources from Peak Ergonomics
Contact Us About Reducing Workplace Injuries
Healthy Employees are the Bottom Line! – Learn More!

Passive Flexor Tendon Stretch helps prevent repetitive strain injuries (RSIs) by stretching the flexor tendon & maintaining its flexibility.


Massage Foot

Massage Foot Techniques  |  Early Intervention Ergonomics

Effective Massage Foot Techniques

Massage foot techniques are highly effective for relieving plantar fascia pain and general foot pain. Let’s discuss the importance of the plantar fascia, which is the tissue that extends from the heel to the ball of the foot, commonly referred to as the arch. Firstly, we will demonstrate a manual massage technique using our thumbs or fingers. By massaging this tissue from the heel to the ball of the foot for approximately three to five minutes, you can experience pain relief.

Another technique involves using a tennis ball, or any other type of ball you have available at home, such as a baseball or a racquetball. The focus remains on targeting the tissue within the arch, as you gently massage along the underside of the foot. Again, dedicating three to five minutes to this massage will provide effective results. Additionally, for acute or recently developed foot pain, a beneficial technique involves freezing a water bottle until it becomes solid. Placing the frozen bottle on the ground, you can roll it back and forth, similar to the tennis ball technique. This combines the advantages of both massage and ice, effectively reducing inflammation in the tissue along the underside of the foot. Once again, dedicating approximately five minutes to this massage will yield positive outcomes.

Early Intervention Benefits

Foot massage techniques offer numerous early intervention benefits for individuals seeking relief from foot pain. Firstly, these techniques actively promote relaxation by stimulating the foot muscles and improving blood circulation. Additionally, they help alleviate discomfort caused by conditions such as plantar fasciitis and general foot pain. Furthermore, foot massages assist in reducing inflammation and swelling in the feet, providing a soothing effect. Moreover, these techniques aid in relieving tension and stress, resulting in an overall sense of well-being.

Another advantage is that foot massages can enhance flexibility and range of motion in the feet, contributing to improved mobility. Furthermore, these techniques can be easily incorporated into daily self-care routines, making them convenient and accessible. Lastly, foot massages can promote better sleep quality by inducing a state of deep relaxation.

Incorporating foot massage techniques into your routine can effectively address foot pain while promoting relaxation and overall foot health.

These early intervention techniques are to improve overall health and fitness as well as help reduce work-related injuries.

If you have an injury or illness, consult with a health care professional before attempting.

More Tools & Resources from Peak Ergonomics
Contact Us About Reducing Workplace Injuries
Healthy Employees are the Bottom Line! – Learn More!

Massage foot techniques are highly effective for relieving plantar fascia pain and general foot pain.


Heel Raises

Heel Raises  |  Early Intervention Ergonomics

What are Heel Raises?

Heel raises, also referred to as calf raises or calf exercises, are a widely practiced physical activity that primarily targets the muscles in the posterior lower leg, specifically the calf muscles. Calf muscles consist of two key components: the gastrocnemius, the larger and more superficial muscle, and the soleus, located beneath the gastrocnemius.

Heel raises involve the controlled lifting of one’s body onto the toes while maintaining straight legs. This exercise is often performed as follows:

  1. Assume a standing position with feet positioned hip-width apart and toes pointed forward.
  2. Utilize a stable surface, such as a wall, bar, or any form of support, to place your hands for balance and stability.
  3. Gradually raise your heels off the ground, transferring the weight of your body onto the balls of your feet.
  4. Maintain the elevated position momentarily, allowing for the sensation of the calf muscles contracting.
  5. Slowly lower your heels back down to the initial starting position.

Heel raises can be executed using both feet simultaneously or with one foot at a time, depending on personal preference and fitness goals. To intensify the exercise, individuals may opt to incorporate resistance elements such as dumbbells or specialized calf raise machines.

Early Intervention Benefits

Heel raises, or calf raises, offer several early intervention benefits for overall fitness and injury prevention. By incorporating heel raises into your exercise routine, you can:

  • Strengthen Calf Muscles: it targets the calf muscles, including the gastrocnemius and soleus, leading to increased strength and endurance.
  • Improve Ankle Stability: it engages the muscles surrounding the ankle joint, enhancing stability and reducing the risk of sprains or other ankle-related injuries.
  • Enhance Workplace Performance: Strong calf muscles from this stretch can boost performance in work-related activities that involve running, jumping, or quick changes in direction.
  • Prevent Shin Splints: Strengthening the calf muscles through this stretch can alleviate strain on the shins, reducing the likelihood of developing painful shin splints.
  • Aid Achilles Tendon Health: Regularly performing this stretch can help maintain the health and flexibility of the Achilles tendon, reducing the risk of tendinitis or Achilles-related injuries.
  • Promote Balance and Posture: The calf muscles play a significant role in maintaining balance and proper posture. Strengthening them through heel raises can contribute to improved stability and alignment.
  • Reduce Lower Leg Injuries: By strengthening the calf muscles and improving ankle stability, this stretch can help prevent common lower leg injuries, such as calf strains or Achilles tendonitis.

Things to Remember

Remember, proper form and gradually increasing intensity are important when performing heel raises to minimize the risk of injury. As always, consult with a healthcare professional or fitness expert before starting any new exercise program.

These early intervention exercises are to improve overall health & fitness as well as help reduce work-related injuries.
If you have an injury or illness, consult with a health care professional before attempting.

Contact us for more information on how we can help your employees stay safe.

More Tools & Resources from Peak Ergonomics
Contact Us About Reducing Workplace Injuries
Healthy Employees are the Bottom Line! – Learn More!

Reduce Lower Leg Injuries: By strengthening the calf muscles and improving ankle stability, heel raises can help prevent common lower leg injuries, such as calf strains or Achilles tendonitis.


Plank Exercise

Plank Exercise | Early Intervention Ergonomics

What is the Plank Exercise?

The plank exercise is a popular core-strengthening exercise that targets several muscle groups, including the abdominals, back, shoulders, and glutes. It is performed by assuming a position similar to a push-up, but instead of supporting yourself with your hands, you support your body weight on your forearms and toes.

Here’s how to perform the plank exercise:

  • Start by positioning yourself face-down on the floor or an exercise mat.
  • Bend your elbows and place your forearms on the ground, with your elbows directly beneath your shoulders.
  • Extend your legs behind you, resting your weight on your toes.
  • Your body should form a straight line from your head to your heels, with your core muscles engaged.
  • Maintain a neutral neck position by looking down at the floor, avoiding arching or rounding your back.
  • Hold this position for a specific amount of time, usually starting with 20 to 30 seconds, and gradually increasing the duration as you build strength.
  • Breathe steadily throughout the exercise.

The plank exercise is effective for building core strength, improving stability, and enhancing overall body control. It can be modified to suit different fitness levels by performing variations such as side planks, plank rotations, or incorporating movements like leg lifts or arm reaches. It’s important to maintain proper form and listen to your body, starting with shorter durations and gradually progressing as you become more comfortable and stronger.

Early Intervention Benefits of this Exercise

The plank exercise offers several early intervention health benefits. Here are some of the key advantages:

Injury prevention: A strong core and improved overall strength contribute to better stability and balance, reducing the risk of injuries, especially in the lower back and hips. The plank exercise helps develop the muscles that support and protect these areas.

Core strength: Planks primarily target the muscles of the core, including the deep abdominal muscles, obliques, and lower back muscles. By regularly performing planks, you can develop a strong and stable core, which is essential for proper posture, spinal alignment, and overall functional strength.

Improved posture: Planks engage the muscles that support the spine, helping to improve posture and reduce the risk of developing poor postural habits. Strengthening the core muscles can also alleviate lower back pain and promote better spinal alignment.

Enhanced overall strength: Planks are not just a core exercise; they also engage other major muscle groups such as the shoulders, glutes, and legs. Holding the plank position requires these muscles to work together, leading to improved overall strength and muscular endurance.

Increased flexibility: Performing planks helps to stretch and strengthen various muscle groups, including the shoulders, hamstrings, and arches of the feet. Over time, this can lead to increased flexibility and joint mobility.

Functional fitness: Planks are a functional exercise that translates to daily activities and work productivity. A strong core is vital for performing everyday tasks, such as lifting, bending, and twisting, with proper form and reduced risk of injury.

If you have an injury or illness, consult with a health care professional before attempting.

This early intervention exercise improves overall health & fitness and helps reduce work-related injuries.

The Plank exercise contributes to better stability and balance, reducing the risk of injuries, especially in the lower back and hips.


Advanced Nerve Stretch

Advanced Nerve Stretch | Early Intervention Ergonomics

What is the Advanced Nerve Stretch?

The “Advanced Nerve Stretch,” also known as the median nerve stretch, is a composite stretch that originates at the nerve roots in the neck and pulls all the way down to the median nerve that passes through the carpal tunnel. Perform this stretch to give your body rest when performing forceful gripping, repetitive gripping, awkward or sustained postures of the elbow, forearm, wrist, and hand to prevent carpal tunnel syndrome. Here is how to perform the advanced nerve stretch:

  1. Stand up straight with your feet shoulder-width apart.
  2. Extend both arms straight out to the side at shoulder level, with your palms facing up.
  3. Next, point your fingers down toward the floor. You palms should be facing away from you.
  4. Gently tilt your head slowly towards your left shoulder, aiming to bring your ear closer to the shoulder.
  5. Next, gently tilt your head slowly towards your right shoulder, aiming to bring your ear closer to the shoulder.
  6. Proceed to gently go back and forth performing about 5 repetitions each.
  7. You should feel the stretch in the opposite arm from where you tilt the head towards the shoulder.

This is an excellent stretch to replenish nutrients and re-oxygenate the distal upper extremity. The advanced nerve stretch combines lateral flexion of the neck with arm extension to stretch the muscles and nerves associated with the median nerve. It can help relieve tension and promote flexibility in the neck, shoulder, and upper limb. However, it’s important to perform the stretch gently and within your pain-free range of motion. If you experience any pain or discomfort, it’s advisable to stop and consult with a healthcare professional for further evaluation.

Early Intervention Benefits

The advanced nerve stretch provides several potential early intervention benefits for those workers who perform work-related activities that involve the elbow, forearm, wrist and hand.  Here are some of those benefits:

  • Relieving Median Nerve Compression: The stretch can help alleviate compression of the median nerve, which runs through the forearm, wrist, and hand. Conditions such as carpal tunnel syndrome, where the median nerve is compressed at the wrist, may benefit from this stretch.
  • Increasing Flexibility: Regularly performing the median nerve stretch can improve flexibility in the wrist, forearm, and hand. This increased flexibility can enhance overall range of motion and function in daily activities.
  • Alleviating Symptoms: The stretch may help alleviate symptoms associated with median nerve compression, such as pain, tingling, numbness, or weakness in the forearm, wrist, hand, and fingers. It can provide temporary relief and promote better nerve function.
  • Promoting Blood Circulation: Stretching exercises, including the median nerve stretch, can enhance blood circulation in the targeted areas. Improved blood flow aids in delivering essential nutrients and oxygen to the muscles and nerves, promoting their health and recovery.
  • Injury Prevention: Engaging in the median nerve stretch, can help prevent injuries to the distal upper extremity. It promotes flexibility and improves the overall range of motion in the wrist, forearm, and hand. Adding this stretch to your morning routine can reduce the risk of strains, sprains, and other musculoskeletal injuries during workplace activities that involve repetitive hand and wrist movements.

Things to Remember:

Remember, while the median nerve stretch can offer potential benefits, it’s important to perform it correctly, within your pain-free range of motion. Listen to your body. If you experience any pain or discomfort during the stretch or have specific concerns, it’s advisable to consult with a healthcare professional for guidance tailored to your individual needs.

These early intervention exercises are to improve overall health & fitness as well as help reduce work-related injuries.

If you have an injury or illness, consult with a health care professional before attempting.

Contact us for more information on how we can help your employees stay safe. Healthy Employees ARE the Bottom Line!

Resources

More Tools & Resources from Peak Ergonomics
Contact Us About Reducing Workplace Injuries
Healthy Employees are the Bottom Line! – Learn More!

The advanced nerve stretch can relieve tension caused by forceful or repetitive gripping and can help prevent carpal tunnel syndrome.


Superman Exercise

Superman Exercise | Prone Extension with Arm & Opposite Leg Lifts 

What is the Superman Exercise?

The prone extension with arms and opposite leg lift exercise, also known as the Superman exercise, is a core-strengthening exercise that targets the lower back, glutes, and hamstrings. Here’s how you perform the exercise:

  1. Lie face down (prone) on a mat or comfortable surface with your legs extended and arms straight out in front of you.
  2. Engage your core muscles by drawing your navel toward your spine.
  3. Simultaneously lift your right arm and left leg off the ground while keeping them straight. Keep your gaze down to maintain a neutral neck position.
  4. Hold the lifted position for a few seconds, focusing on contracting your glutes and engaging your lower back muscles.
  5. Slowly lower your right arm and left leg back to the starting position.
  6. Repeat the movement on the opposite side, lifting your left arm and right leg.
  7. Continue alternating sides for the desired number of repetitions or time.

It’s important to maintain proper form during this exercise. Avoid arching your lower back excessively or lifting your limbs too high, as this can strain your back. Start with a comfortable range of motion and gradually increase it as you build strength and stability.

Early Intervention Benefits of this Prone Extension Exercise

Here are some potential early intervention health benefits associated with this exercise:

  • Strengthening the back muscles: The prone extension exercise primarily targets the muscles of the lower back, such as the erector spinae and multifidus. Moreover, regular practice of this exercise can effectively strengthen these muscles, leading to several benefits. Firstly, it can contribute to better posture and spinal stability. Additionally, it may help reduce the risk of lower back pain.
  • Improving core stability: While performing the prone extension exercise, you engage the deep core muscles, including the transverse abdominis and the muscles of the pelvic floor. These muscles play a vital role in providing stability and support to the spine. Strengthening the core can enhance overall trunk stability and reduce the risk of injuries.
  • Enhancing shoulder stability: The arm lift component of this exercise targets the muscles of the shoulder, including the deltoids, rotator cuff muscles, and scapular stabilizers. Regular practice can help improve shoulder stability, which is important for maintaining proper posture and reducing the risk of shoulder injuries.
  • Engaging the gluteal muscles: The opposite leg lift component of the exercise activates the gluteal muscles, including the gluteus maximus, medius, and minimus. These muscles are important for hip stability and proper lower limb mechanics. Strengthening the glutes can contribute to improved posture, reduced risk of hip and knee injuries, enhanced employee workplace performance along with workplace productivity.
  • Promoting overall body coordination: The prone extension exercise involves lifting the opposite arm and leg while maintaining stability and control. This movement requires coordination and balance, which can help improve overall body awareness and neuromuscular control.

Things to remember…

It’s important to note that the health benefits may vary from individual to individual. It’s always a good idea to consult with a healthcare professional before starting a new exercise routine. If you have an injury or illness, consult with a health care professional before attempting. They can provide personalized recommendations based on your specific needs and any underlying health conditions. These early intervention exercises are to improve overall health and fitness and help reduce work-related injuries.


Seated Hamstring Stretch

Seated Hamstring Stretch for Healthy Back & Legs

What is the Seated Hamstring Stretch?

The Seated Hamstring Stretch is a simple and effective exercise that can help improve flexibility and relieve tightness in the hamstrings. To perform this stretch, start by sitting on a chair and scoot to the front of the chair. Next, extend your right leg so that your knee is completely straight. Make sure that your heel is on the ground and that your toes are pointing up in the air. Next, reach down towards your toes with both hands while keeping your knee straight.  Also, make sure that you are keeping both your chest and your head upright as you reach. Hold the stretch for 3-5 seconds, feeling the stretch in the back of your leg. Finally, repeat the stretch with your left leg.

To deepen the stretch, you can try reaching further forward or using a towel or yoga strap to help you gently pull yourself closer to your toes.

Overall, the Seated Hamstring Stretch is an excellent way to stretch and lengthen the hamstrings, which can help improve posture, reduce the risk of injury, and enhance workplace performance. This is an excellent stretch that replenishes nutrients and re-oxygenate the hamstrings muscles in the lower extremity. Perform this stretch to give your body a rest when performing activities that involve lifting, carrying, foot pedal use, prolonged standing, or prolonged walking.

Early Intervention Benefits of this Stretch

The seated hamstring stretch offers numerous early intervention health benefits that can improve your overall physical well-being.

Firstly, this stretch can increase flexibility and range of motion in the hamstrings. When you sit on the floor with your legs straight out in front of you and reach forward to touch your toes, you are lengthening and stretching the hamstring muscles. This can help to prevent injuries and improve your performance in physical activities that require a greater range of motion.

Additionally, the seated hamstring stretch can help to alleviate lower back pain. Tight hamstrings can contribute to lower back pain by placing extra stress on the lower back muscles. By stretching the hamstrings, you can relieve some of this tension and reduce the risk of developing lower back pain.

Moreover, the seated hamstring stretch can improve posture and balance. Tight hamstrings can cause an anterior pelvic tilt, which can result in poor posture and balance. By stretching the hamstrings regularly, you can correct this tilt and improve your posture and balance.

In conclusion, the seated hamstring stretch offers a range of health benefits, including increased flexibility and range of motion, relief from lower back pain, and improved posture and balance. By incorporating this stretch into your exercise routine, you can enhance your physical well-being and reduce the risk of injury.

These early intervention exercises are to improve health and fitness.
If you have an injury or illness, consult with a health care professional before attempting.

More Tools & Resources from Peak Ergonomics
Contact Us About Reducing Workplace Injuries
Healthy Employees are the Bottom Line! – Learn More!

Seated hamstring stretch is for activities that involve lifting, carrying, foot pedal use, prolonged standing, or prolonged walking.


Pull Apart: Straight & Bent Arm

Pull Apart: Straight & Bent Arm | Early Intervention Ergonomics

What is the Pull Apart: Straight & Bent Arm Stretch?

The Pull Apart: Straight & Bent Arm with a Band exercise is a resistance band exercise that primarily targets the muscles of the upper back, shoulders, and arms. It is a great exercise for improving posture, strengthening the shoulder girdle, and enhancing upper body stability.

Here’s how to perform the Pull Apart Straight & Bent Arm exercise:

  1. Start by standing with your feet shoulder-width apart and grasping a resistance band with both hands. Hold the band in front of you, keeping your palms facing downward and your arms extended straight out in front of your body.
  2. Maintain a slight bend in your elbows and engage your core for stability.
  3. Begin the exercise by simultaneously pulling the band apart with both hands, moving your arms out to the sides. Imagine squeezing your shoulder blades together as you do this, focusing on engaging the muscles of your upper back. Hold for 2-3 seconds, then relax.
  4. Another variation is to turn the band over with your palms facing up. Proceed with the stretch as instructed previous steps 1-3.
  5. Slowly return your arms back to the starting position, controlling the resistance of the band. Keep tension on the band throughout the movement.
  6. For the Bent Arm Variation,  start with palms up and hands a little closer together. Keep your elbows tight against your side.  Set your shoulder blades back again, then pull your hands apart keeping those elbows tight against your side.
  7. Repeat the exercise for 10-15 repetitions.

It’s important to maintain proper form throughout the exercise. Avoid shrugging your shoulders or letting your back excessively arch. Focus on using the targeted muscles to perform the movement.

As with any exercise, it’s recommended to start with lighter resistance bands and gradually increase the tension as your strength improves. If you’re unsure about performing this exercise or have any specific concerns, it’s always a good idea to consult with a fitness professional for guidance.

Early Intervention Benefits of this Exercise

The Pull Apart Straight Arm & Bent Arm with a Band exercise offers several early intervention benefits for the muscles targeted and overall upper body strength and stability. Here are some of the key benefits:

  • Upper back and shoulder strengthening: The exercise primarily targets the muscles of the upper back, including the rhomboids, rear deltoids, and middle trapezius. It helps to strengthen these muscles, improving posture, and promoting better upper body alignment.
  • Shoulder stability: By engaging the muscles around the shoulder girdle, including the rotator cuff muscles, the exercise enhances shoulder stability. This can be particularly beneficial for individuals involved in work activities that require overhead movements.
  • Improved posture: The exercise helps counteract the effects of rounded shoulders and forward head posture, which are common issues due to modern lifestyle factors like prolonged sitting and desk work. Strengthening the upper back muscles can promote better posture and alignment.
  • Shoulder joint mobility: Performing the exercise with a resistance band requires a controlled range of motion, which can contribute to maintaining and improving shoulder joint mobility. It helps to prevent stiffness and enhance overall shoulder flexibility.
  • Versatility and accessibility: The exercise can be performed with a resistance band, which is a portable and affordable piece of equipment. It allows for a wide range of resistance levels, making it suitable for people of different fitness levels and abilities.
  • Injury prevention: Strengthening the upper back and shoulder muscles can serve as a preventive measure against common injuries, such as shoulder impingement and postural imbalances. The exercise can also be used as part of a rehabilitation program for certain shoulder and upper back conditions.

Remember, consistency and proper form are key when performing any exercise. Gradually increasing resistance as you build strength and seeking guidance from a fitness professional can help you maximize the benefits of this exercise while minimizing the risk of injury.

If you have an injury or illness, consult with a health care professional before attempting.

These early intervention exercises are vital to improve overall health and fitness as well as reduce work-related injuries.

More Tools & Resources from Peak Ergonomics
Contact Us About Reducing Workplace Injuries
Healthy Employees are the Bottom Line! – Learn More!

Pull Apart: Straight & Bent Arm is a preventive measure against common injuries, such as shoulder impingement and postural imbalances.


Active Extensor Tendon Stretch

Active Extensor Tendon Stretch | Early Intervention Ergonomics

What is the Active Extensor Tendon Stretch?

The Active Extensor Tendon Stretch is an excellent stretch to replenish nutrients and re-oxygenate the distal upper extremity. This composite stretch originates at the common wrist extensor tendon of the lateral epicondyle and pulls all the way down to the extensor hood mechanism of the fingers. Perform this stretch to give your body rest when performing forceful gripping, repetitive gripping, awkward or sustained postures of the elbow, forearm, wrist, and hand to prevent common disorders such as tennis elbow, tendinitis, tendinosis, and muscle strain.

This stretch is a type of exercise that targets the extensor muscles in the arms and hands. These muscles are responsible for opening the hand and extending the wrist.

Here’s how to perform an active extensor tendon stretch:

  1. Sit or stand with good posture, with your arms at your sides and your palms facing inwards.
  2. Slowly raise your arms out to the side, keeping them straight, until they are level with your shoulders.
  3. Turn your palms to face the floor, and then slowly extend your wrists so that your fingers point upwards.
  4. Hold this position for a few seconds, feeling the stretch in your forearms and hands.
  5. Slowly lower your arms back down to your sides, and then repeat the exercise for several repetitions.

It’s important to perform this exercise slowly and carefully, without over-stretching the muscles. Stop if you feel any pain or discomfort, and don’t force the stretch beyond your limits. You can perform this exercise as part of a warm-up routine before engaging in any activities that require hand and wrist movement, such as sports or typing.

Early Intervention Benefits of this Stretch

Firstly, the Active Extensor Tendon Stretch can help improve grip strength. By stretching the extensor tendons, you can increase the strength of your grip. Additionally, this exercise can reduce the risk of injuries such as tennis elbow and golfer’s elbow, which can be caused by tight extensor tendons.

Moreover, regular practice of the this stretch can increase your range of motion in your wrist and fingers. This benefit is especially useful for athletes and manual laborers. Lastly, if you experience pain in your forearm or wrist, this exercise can help alleviate the pain by loosening tight muscles and tendons.

Overall, the Active Extensor Tendon Stretch is a simple but powerful exercise that can have a significant impact on your forearm, wrist, and hand health.

These early intervention exercises are to improve health and fitness.
It is important to note, if you have an injury or illness, consult with a health care professional before attempting.

Resources

More Tools & Resources from Peak Ergonomics
Contact Us About Reducing Workplace Injuries
Healthy Employees are the Bottom Line! – Learn More!

Active Extensor Tendon Stretch can reduce the risk of injuries such as tennis elbow and golfer's elbow, which can be caused by tight extensor tendons.


Side Plank

Side Plank Exercise for a Healthy Spine & Core

What is the Side Plank?

The side plank is an effective variation of the plank exercise that specifically targets the obliques, hips, and shoulders. To start, lie on your side with your legs extended and stacked. Then, use your forearm to prop yourself up, ensuring that your elbow is aligned with your shoulder. Engage your core muscles and lift your hips off the ground to create a straight line from your head to your heels. Hold this position for 30 seconds to 1 minute before switching sides.

By adding variations to the side plank such as lifting a leg, lifting an arm, or incorporating hip dips or rotations, you can engage different muscles and increase the challenge. The side plank is a core-strengthening exercise that can enhance your balance, stability, and alleviate lower back pain.

What are the Early Intervention Benefits?

This exercise provides numerous early intervention benefits for the body, making it an ideal addition to any fitness routine. By specifically targeting the obliques, hips, and shoulders, it can help to tone and strengthen these areas. This exercise also improves core stability and balance, making it a great way to prevent lower back pain and injury.

In addition, this exercise offers versatility by allowing you to perform variations such as lifting a leg, lifting an arm, or incorporating hip dips or rotations. These modifications can help to engage different muscle groups and increase the challenge level.

Overall, the side plank is an effective and accessible exercise that offers significant benefits for your body. By incorporating it into your routine, you can improve your core strength, balance, and stability while reducing the risk of injury.

These exercises are to improve health and fitness.
If you have an injury or illness, consult with a health care professional before attempting.

More Tools & Resources from Peak Ergonomics
Contact Us About Reducing Workplace Injuries
Healthy Employees are the Bottom Line!

The side plank can improve your core strength, balance, and stability while reducing the risk of injury.


Wide Stance Power Lift

Wide Stance Power Lift

What is the Wide Stance Power Lift?

The wide stance powerlift refers to a style of lifting where the lifter positions their feet wider apart than shoulder-width, with toes pointing outwards. This wider stance helps to engage the hips, glutes, and hamstrings more effectively, allowing for safe lifting of heavy objects. The wide stance can be used as an effective training technique to improve overall strength and power.

Early Intervention Benefits of this Lifting Technique

  • Reduced stress on the lower back: By engaging the hips, glutes, and hamstrings more effectively, the wide stance powerlift can help reduce stress on the lower back during lifting, making it a safer option for people with a history of lower back pain or injury.
  • Increased muscle activation: The wider stance helps to activate more muscle fibers, especially in the glutes and hamstrings, which can help to improve overall lower body strength and power.
  • Improved joint stability: The wide stance powerlift requires strong hip and knee stability, which can help to improve joint health and reduce the risk of injury.
  • Better posture and alignment: Performing the wide stance powerlift with proper technique can help to improve posture and alignment, reducing the risk of strain or injury to the neck, shoulders, and upper back.
  • Increased bone density: The high levels of force and stress placed on the bones during the wide stance powerlift can help to improve bone density, reducing the risk of osteoporosis and other bone-related conditions.

It’s important to note that the wide stance powerlift, like any exercise, can be risky if performed improperly. It’s essential to use proper technique, appropriate weight loads, and gradually progress to more challenging weights to minimize the risk of injury.

Things to Remember

It’s important to note that while these exercises can be beneficial, it’s crucial to perform them with proper form and within your pain-free range of motion. If you have any underlying back or hip conditions, it’s advisable to consult with a healthcare professional or a physical therapist before incorporating these exercises into your routine.

If you experience any pain or discomfort during the exercise or have specific concerns, it’s advisable to consult with a healthcare professional for guidance tailored to your individual needs.

These early intervention exercises are to improve overall health & fitness as well as help reduce work-related injuries.

If you have an injury or illness, consult with a health care professional before attempting.

Contact us for more information on how we can help your employees stay safe. Healthy Employees ARE the Bottom Line!

More Tools & Resources from Peak Ergonomics
Contact Us About Reducing Workplace Injuries
Healthy Employees are the Bottom Line! – Learn More!

Wide Stance Power Lift for safely lifting heavy objects.


Dead Bug Exercise

Dead Bug Exercise  |  Early Intervention Ergonomics

What is the Dead Bug Exercise?

The Dead Bug Exercise is a popular core exercise that targets the muscles of the abdominal area and lower back. Furthermore, it is commonly used in fitness training, physical therapy, and rehabilitation programs. Interestingly, the exercise gets its name from the way it resembles a dead bug lying on its back with its legs and arms in the air.

Here’s how to perform the Dead Bug Exercise:

  1. Start by lying flat on your back on a mat or the floor. Bend your knees and lift your legs so that your thighs are perpendicular to the floor. Your lower legs should be parallel to the floor, creating a 90-degree angle at the knees.
  2. Raise your arms straight up toward the ceiling, extending them directly above your shoulders. Additionally, ensure that your palms are facing each other.
  3. Brace your core muscles by drawing your belly button in toward your spine. This will help stabilize your spine throughout the exercise.
  4. Begin the movement by simultaneously extending your right leg forward and lowering your left arm overhead until they are a few inches above the floor. Keep your lower back pressed into the floor throughout the movement to maintain stability.
  5. Return your leg and arm back to the starting position and repeat the movement on the opposite side, extending your left leg and lowering your right arm.
  6. Continue alternating sides in a controlled manner, maintaining proper form and alignment. Exhale as you extend your leg and arm, and inhale as you return to the starting position.

This exercise helps to strengthen the deep core muscles, improve stability, and promote better posture. It can be modified to suit different fitness levels by adjusting the range of motion or adding resistance, such as holding a stability ball or using resistance bands.

Early Intervention Benefits

The Dead Bug Exercise offers several early intervention benefits. Here are some of them:

  • Core Strengthening: The Dead Bug Exercise primarily targets the muscles of the core, including the rectus abdominis, transverse abdominis, and obliques. By engaging these muscles, it helps improve core strength and stability. A strong core is essential for maintaining proper posture, supporting the spine, and enhancing overall functional movement.
  • Spinal Stability: The exercise promotes spinal stability by challenging the muscles that surround and support the spine. It helps develop a strong and stable core, which can reduce the risk of back pain and injuries. By improving spinal stability, this exercise can also contribute to better posture and alignment.
  • Balance and Coordination: The alternating leg and arm movements in the Dead Bug Exercise require coordination and balance. Moreover, regularly practicing this exercise can enhance neuromuscular coordination, thereby helping you improve your balance and body control not only in the workplace but also in various other activities.
  • Injury Prevention: The Dead Bug Exercise can help prevent injuries by strengthening the core and improving stability. Moreover, a strong core provides a solid foundation for movements, thereby reducing the risk of excessive strain on the lower back. Additionally, it can help improve body mechanics and decrease the likelihood of overcompensation by other muscles, ultimately minimizing imbalances and potential injuries.
  • Rehabilitation and Posture Correction: The Dead Bug Exercise is commonly used in physical therapy and rehabilitation programs. It can be effective in rehabilitating and strengthening the core muscles after certain injuries or surgeries. Additionally, by targeting the muscles responsible for maintaining good posture, the exercise can assist in correcting postural imbalances and promoting a more aligned and stable body position.

Things to Remember

It’s important to perform the Dead Bug Exercise with control and avoid arching your back or allowing your lower back to lift off the floor. As always, consult with a qualified fitness professional or healthcare provider before starting any new exercise program.

Remember, while the Dead Bug Exercise offers numerous benefits, it’s important to perform it with proper form and technique to maximize its effectiveness and minimize the risk of injury. If you have any specific concerns or pre-existing conditions, consult with a qualified fitness professional or healthcare provider to ensure it’s suitable for you.

These early intervention exercises are to improve overall health & fitness as well as help reduce work-related injuries.

If you have an injury or illness, consult with a health care professional before attempting.

Contact us for more information on how we can help your employees stay safe.

Resources

More Tools & Resources from Peak Ergonomics
Contact Us About Reducing Workplace Injuries
Healthy Employees are the Bottom Line! – Learn More!

The Dead Bug Exercise can help prevent injuries by strengthening the core and improving stability. A strong core reduces lower back strain.