Passive Extensor Tendon Stretch

Passive Extensor Tendon Stretch  |  Early Intervention Ergonomics

What is the Passive Extensor Tendon Stretch?

This advanced stretch replenishes nutrients and re-oxygenates the distal upper extremity. It’s a composite stretch that originates at the common wrist extensor tendon of the lateral epicondyle and pulls all the way down to the extensor hood mechanism of the fingers. Perform this stretch to give your body rest when engaging in forceful gripping, repetitive gripping, or awkward and sustained postures of the elbow, forearm, wrist, and hand. By doing so, you can effectively prevent common disorders such as tennis elbow, tendinitis, tendinosis, and muscle strain.

Here’s how to perform the passive extensor tendon stretch:

  1. Bring one arm straight out in front of you, and make a gentle fist.
  2. Using your opposite hand, gently pull your fist downward so that you feel the stretch in your forearm with no pain in the wrist.
  3. Hold the stretch for approximately 5 seconds, then relax.
  4. Repeat the stretch on the opposite hand feeling the stretch in your forearm with no pain in the wrist.

Early Intervention Benefits

Stretching the wrist extensor tendons offers several early intervention benefits, including injury prevention. Here are some advantages of stretching these tendons:

  • Enhanced Flexibility: Regular stretching of the wrist extensor tendons improves their flexibility and range of motion. This can be particularly beneficial for factory workers, construction workers, and anyone involved in activities that require repetitive wrist movements.
  • Injury Prevention: Stretching the wrist extensor tendons helps to prevent injuries such as wrist sprains, strains, and tendonitis. By maintaining flexibility in these tendons, you reduce the risk of overuse injuries and potential damage caused by repetitive or forceful wrist motions.
  • Reduced Muscle Tension: Stretching helps to relieve muscle tension and tightness in the wrist extensor tendons. This can be especially helpful for individuals who spend long hours performing tasks that strain the wrists, such as typing or using handheld devices.
  • Improved Circulation: Stretching promotes blood flow to the wrist extensor tendons, which helps to nourish the tissues and remove metabolic waste products. As a result of this enhanced circulation, the overall health and function of the tendons are supported, thereby reducing the risk of injuries and promoting faster recovery.
  • Alleviation of Discomfort: Stretching exercises for the wrist extensor tendons can help alleviate discomfort or pain caused by conditions like tennis elbow (lateral epicondylitis) or repetitive strain injuries. Stretching increases flexibility, which can reduce tension and stress on the tendons, providing relief from symptoms.
  • Improved Work Performance: Flexible wrist extensor tendons allow for smoother and more efficient movement of the wrist joint. This can improve performance with workplace activities that involve gripping, lifting, or repetitive wrist motions.

Things to Remember

When engaging in stretching exercises, it is crucial to approach them with proper technique and avoid overstretching. This is because excessive force or incorrect form can result in injury. If you experience pain or discomfort, ease off the stretch or consult with a healthcare professional.

These early intervention exercises are to improve overall health and fitness as well as reduce work related injuries.
If you have an injury or illness, consult with a health care professional before attempting.

More Tools & Resources from Peak Ergonomics
Contact Us About Reducing Workplace Injuries
Healthy Employees are the Bottom Line! – Learn More!

The passive extensor tendon stretch helps to reduce the risk of overuse injuries and damage caused by repetitive or forceful wrist motions.


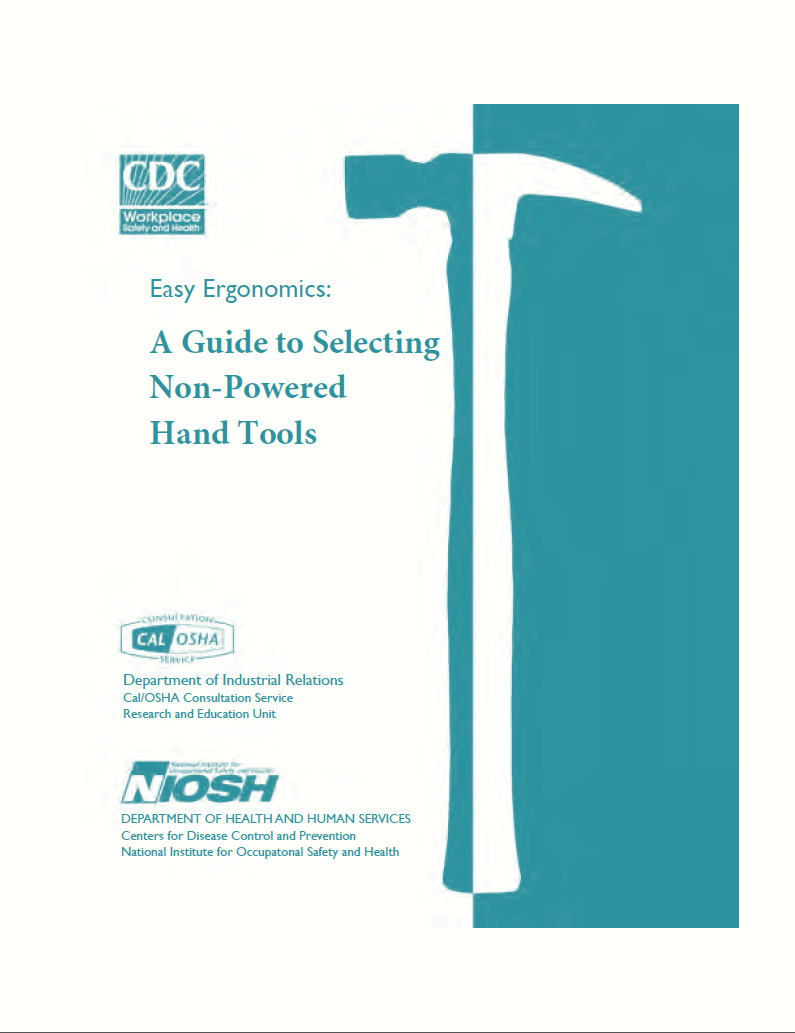
Easy Ergonomics: A Guide to Selecting Non-Powered Hand Tools

Click to Download

Ergonomic Guidelines for Manual Material Handling

Click to Download

Towel Calf Stretch

Towel Calf Stretch

What is the Towel Calf Stretch?

The towel calf stretch is a simple exercise that involves stretching the calf muscles using a towel or strap.

To use a towel to stretch your calf muscles, you can follow these steps:

  • Sit on a chair with your leg straight out in front of you and your back straight.
  • Loop a towel or strap around the ball of your foot, holding onto both ends of the towel with your hands.
  • Slowly pull the towel towards you, keeping your leg straight. You should feel a stretch in your calf muscles.
  • Hold the stretch for 3-5 seconds, then release and relax for a few seconds.
  • Repeat the stretch 2-3 times, then switch legs and repeat the stretch on the other side.

It’s important to avoid bouncing or jerking the towel when stretching, as this can lead to injury. Instead, try to maintain a slow, steady pull on the towel to gradually increase the stretch in your calf muscles. You may also want to experiment with different towel positions, such as looping the towel around the arch of your foot, to target different parts of your calf muscles.

Early Intervention Benefits of this Stretch

  • Improving flexibility: The towel calf stretch is an effective way to stretch and improve the flexibility of the calf muscles. This can help reduce the risk of injury and improve athletic performance.
  • Relieving muscle tension: Tight calf muscles can cause discomfort and pain. Regularly performing the towel calf stretch can help alleviate muscle tension and reduce discomfort.
  • Improving circulation: Stretching the calf muscles can help increase blood flow and oxygenation to the muscles. This can help improve overall circulation and reduce the risk of blood clots.
  • Reducing the risk of injury: Tight calf muscles can increase the risk of injury, especially during activities that require sudden changes in direction or jumping. By regularly stretching the calf muscles, you can reduce the risk of injury and improve your overall fitness level.
  • Improving posture: Tight calf muscles can affect your posture and cause lower back pain. Regularly performing this stretch can help improve your posture and reduce the risk of lower back pain.

These early intervention exercises are to improve health and fitness. It’s important to note that this stretch can be beneficial, it’s important to perform the exercise correctly to avoid injury. If you have any concerns about starting a stretching routine, it’s always a good idea to consult with a healthcare professional first.

More Tools & Resources from Peak Ergonomics
Contact Us About Reducing Workplace Injuries
Healthy Employees are the Bottom Line! – Learn More!
Towel Calf Stretch to Help Reduce Injury


Full Spectrum Ergonomics: From Prevention to Work Causation Determination

Past Seminar


Columbia: Tuesday, October 23rd, 2018 @ Stoney Creek Hotel & Conference
Cape Girardeau: Tuesday, October 30th @ Drury Plaza Hotel & Conference

Agenda:

8:00am – 8:30am: Registration & Continental Breakfast

8:30am – 10:00am:

“Prevention: The Ideal Application of Ergonomics” by Mark Woodward

10:00am – 10:15am: Break

10:15am – 11:45am:

“Early Intervention: The Realistic Application of Ergonomics” by Paul Krewson

11:45am – 12:15pm: Lunch provided

12:15pm – 1:15pm:

“Work Causation Determination: The Unfortunate Application of Ergonomics” by Tyler Brown Part 1

1:15pm – 1:30pm: Break

1:30pm – 3:00pm:

“Work Causation Determination: The Unfortunate Application of Ergonomics” by Tyler Brown Part 2

Tuition: $149

Early Bird: $129 if you register at least 2 weeks in advance.

Two or more from same business: $88 each person.

Pricing includes breakfast, lunch and 5.5 hours of Continuing Education

Prone Scapula Raises

Prone Scapula Raises  |  Early Intervention Ergonomics

What are the Prone Scapula Raises?

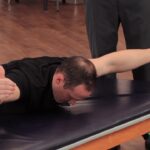
The prone scapula raise exercise is a movement that primarily targets the muscles of the upper back and shoulder region. It helps improve scapular stability, posture, and strength in the muscles responsible for retracting and depressing the scapulae (shoulder blades).

Here’s how you can perform the prone scapula raise exercise:

  1. Lie face down on a flat surface, such as an exercise mat or bench.
  2. Extend your arms straight out in front of you, hold thumbs up like Fonzie pointed towards the ceiling. Hold this for two or three seconds and back down from that position.
  3. Next, bring your arms out a little bit wider, more into a “Y” position again making sure that your thumbs are rotating up towards the ceiling while lifting your arms off the mat or bench. Now bring the arms back down.
  4. Now bring your arms down straight out to the side, and as you lift your arms up, rotate the thumbs up again towards the ceiling. Keep that chin tucked so you’re not leading with your head.
  5. Finally, bring your hands together into a “W” position, lifting up the thumbs again pointed towards the ceiling. Then back down all the way to our side and what we’re going to do is lift our hands up, rotate thumbs up as we’re lifting the head, the chest and the shoulders up off of the mat or bench and then relax.
  6. This sequence typically is repeated 3-4 times with one or two repetitions each.

It’s important to note that the prone scapula raise exercise primarily targets the muscles responsible for scapular retraction and depression rather than the muscles involved in arm

Early Intervention Benefits of this Exercise

The prone scapula raise exercise offers several benefits for the muscles and structures involved in scapular stability and posture. Here are some of the key early intervention benefits:

  • Scapular Stability: The exercise targets the muscles that retract and depress the scapulae, such as the rhomboids, middle trapezius, and lower trapezius. By strengthening these muscles, it improves scapular stability, which is crucial for proper shoulder mechanics and overall upper body function.
  • Posture Improvement: Weakness or imbalance in the muscles around the scapulae can contribute to poor posture, including rounded shoulders and forward head posture. The prone scapula raise exercise helps correct these postural imbalances by strengthening the muscles responsible for scapular retraction, promoting a more upright and aligned posture.
  • Shoulder Health: Proper scapular function is essential for healthy shoulder movement. By strengthening the muscles that stabilize and control scapular motion, the exercise can reduce the risk of shoulder injuries, impingements, and overuse syndromes.
  • Upper Back Strength: The prone scapula raise exercise engages the muscles of the upper back, including the rhomboids, middle trapezius, and lower trapezius. By targeting these muscles, it improves upper back strength, which is important for daily work activities, and overall functional fitness.
  • Rehabilitation: The exercise is often prescribed as part of rehabilitation programs for various shoulder and upper back conditions, such as shoulder impingement syndrome, rotator cuff injuries, and postural abnormalities. It helps retrain and strengthen the muscles involved in scapular stability and control, aiding in the recovery process.
  • Body Awareness: Performing the prone scapula raise exercise requires mindful control of scapular movement and muscle activation. Over time, it enhances body awareness and proprioception, allowing individuals to better understand and control their shoulder and upper back positioning in various movements and activities.

Things to Remember…

Remember, consistency and proper form are essential for reaping the benefits of any exercise. If you have specific concerns or conditions, it’s always advisable to consult with a qualified healthcare or fitness professional who can provide personalized guidance tailored to your needs.

This early intervention exercise is used to improve overall health and fitness as well as help reduce work-related injuries.  If you have an injury or illness, consult with a health care professional before attempting.

More Tools & Resources from Peak Ergonomics
Contact Us About Reducing Workplace Injuries
Healthy Employees are the Bottom Line! – Learn More!
Prone Scapula Raises stabilize and control scapular motion thus reducing the risk of shoulder injuries, impingements, and overuse syndromes.


Mark Twain’s Connection to Ergonomics

Exploring Mark Twain's connection to ergonomics - the master storyteller's use of ergonomics to compose his final works.

Ergonomist and a Scholar

I grew up in Hannibal, MO and played in the same woods, bluffs, caves, river, creeks, and islands as our most beloved citizen and the Father of American Literature. While my primary occupation is ergonomics, secondarily I would consider myself a Mark Twain scholar. Mark Twain’s connection to ergonomics certainly piqued my interest. In particular, it is remarkable to witness the continuous discovery of items associated with Twain even after his death in 1910. Just last year, publishers released a children’s book that utilized a recently unearthed manuscript. Lost manuscripts and notebooks seem to pop up every so often. The man had a deep love for writing and dedicated numerous hours every day to it throughout most of his 75-year life. During the creation of Life on the Mississippi, he even pushed himself to write for 20 hours a day continuously for 6 weeks. Additionally, his absent-minded nature led to frequent misplacement of his belongings. His extensive travels around the world for many years have created circumstances in which numerous lost treasures are still waiting to be discovered.

Unveiling Mark Twain’s Writing Rituals

I find it intriguing that it was essential for Twain to write using pen and paper. He purchased his first typewriter in 1874 for $125 ($2,800 in today’s money). However he returned it a year later saying that it corrupts his morals because it makes him want to swear. He tried to dictate using the Edison Dictaphone, but he couldn’t find his creativity with dictation. While he is credited as the first American author to submit a typed manuscript—1883’s Life on the Mississippi—he achieved this by dictating his hand-written draft onto a wax cylinder and subsequently hiring a typist. The creativity went from his brain to his handwriting with pen and paper. He wrote until his entire right arm was in severe pain. Then, he would switch to his left hand and write with it for as long as he could tolerate. He was not a left-handed person but forced himself because of his yearning to write. No wonder he had a hot whiskey every night before bedtime! He said he would drink it to prevent toothaches and it worked because he never had a toothache. When I imagine him writing left-handed, I think of ergonomics and how we teach people to be as ambidextrous as possible.

Twain’s Acceptance of Ergonomic Solutions

I have asked workers countless times to try using their opposite side more frequently in order to alleviate fatigue in their dominant extremity caused by repetitive motions. Many times, we find workers will resist, but not Mark Twain. He wanted to write and even if he felt his right arm was about to fall off, he wasn’t going to let it stop him. I also find it interesting that there seemed to be a feasible ergonomic solution with the typewriter and Edison Dictaphone, but he could not find his creative juices for writing with them. There was something cathartic for him to write with the hand using pen and paper that could not be achieved by speaking into a recorder or striking keys on a typewriter. He made several recordings on the Edison Dictaphone wax cylinders, but they are all lost at present. There are currently no audio recordings of Twain’s voice. This is a shame because the technology was present and he is one of the most legendary storytellers in American history.

Mark Twain’s Investment in Ergonomics

Mark Twain invested heavily in an ergonomic invention. He invested $300,000 ($8 million in today’s money) in something called the Paige Compositor. The machine was intended to replace a team of 8 workers for setting type in a newspaper; however, its precision fell short of the newspaper’s requirements. Before perfecting this invention, the Linotype machine emerged in 1884 and rendered the Paige Compositor obsolete. Two machines were constructed in total, with Cornell University disposing of theirs during a scrap drive in World War II. The surviving machine is now exhibited at the Mark Twain House in Hartford, Connecticut. This failed invention played a part in Twain filing for bankruptcy at the age of 59. Twain possessed a fascination for inventions but seemed to encounter misfortune when it came to his investment choices. Twain had a poor mind for commerce and made many blunders when conducting business transactions. Mr. Bell once asked Twain to invest in his newly discovered telephone, but Twain didn’t see the need and turned him down. After bankruptcy, Twain traveled the world for many years lecturing as a humorist. He made a lot of money doing so and paid back all his debts, even though he had no legal obligation to do so. This act led to him receiving a hero’s welcome when he returned to the United States in October of 1900.

Twain’s Autobiographies & Embarrassment

Publishers released his most recent autobiographies, consisting of three large volumes, over 100 years after his death. He deliberately chose this timing to ensure he could express his thoughts and experiences with utmost honesty. He figured that after 100 years no one would be alive that could cause embarrassment to his family or friends. While Mark Twain did not fear death and openly embraced the idea, he harbored a fear of ostracism and wished to shield his friends and family from ridicule. When he began work on these posthumous autobiographies in 1906, he hired a stenographer. He began his day looking at the newspaper with the stenographer by his side. When he read something that would jog his memory of an interesting life event, then he would tell the story to the stenographer and she would write it down. If he was in the middle of a story and that reminded him of another story, then he would leave the first story and chase after the new one. He was a master storyteller, and this seemed to be the ergonomic solution for him to compose his final works. It also makes for an interesting autobiography. There is no rhyme or reason to the procession. You just read story after story of his life events that jump all around history.

Mark Twain’s Connection to Ergonomics & the Obstacles He Had to Overcome

In ergonomics, we closely examine the work station and how it fits with the worker. Twain spent most of his time working in bed during his last decade. Twain and his wife, Livy, purchased the bed on a trip to Venice in 1878 for $200 ($5,000 in today’s money). Carved in dark walnut with twists and turns leading to angels perched high and low across the bed and atop each of its four posts. His only surviving child Clara Clemens talked about how much time Twain had spent in bed. She said this about her father in 1908: “While I have been tiring myself out in an endeavor to rise to the heights as anybody else’s daughter he has just laid in bed and thought things and got out of bed now and then to loaf around on a lecture tour or tramp lazily through Europe. That’s why I’m looking for a really comfortable bed. Genius is the art of taking – to bed.” Clara had a difficult relationship with her dad. She was a professional musician but could not escape the shadow of being Mark Twain’s daughter. At her first concert, the marque outside reading, in small letters: “Clara Clemens” and in large letters: “Daughter of Mark Twain.” She tried to stay away from him and was usually found on a different continent than the one he was on. This is heartbreaking, because she was all he had left at the end of his life in 1910 and she was not there for him. Clara died in 1962 at the age of 88 and had one daughter, Nina. Nina died four years later at the age of 55 and was the last living direct descendant of Twain.

Mark Twain’s Connection to Ergonomics Through Personal Tragedy

Working in the field of ergonomics in the 21st century, we rarely see a tragedy. Most of the difficulties that we encounter pale in comparison to the difficulties that Mark Twain faced in the 19th century. At the age of 11, Twain witnessed his father being caught in a severe thunderstorm while riding his horse home from work. He developed pneumonia and died one week later. This pushed Twain out of school and into the workforce as a typesetter’s apprentice for the Hannibal Courier Post. His younger brother Henry perished in a tragic steamboat accident while on the job at the age of 20. Twain held himself responsible as he had secured that job for Henry. Twain reflects on the likelihood that both his father and Henry’s deaths resulted from accidental painkiller overdoses. Twain’s sickly son Langdon passed away at 19 months, and Twain blamed himself because he had taken his son on an early morning carriage ride where Langdon’s blanket slipped off. Twain failed to notice this until the ride had concluded, resulting in his son’s legs becoming frozen. Langdon died shortly thereafter. Twain concealed his guilt and shame over this episode until the 2010 published autobiography. His oldest daughter Suzy died when she was 24 in Connecticut and the rest of the family was in Europe. Suzy did not go to Europe because she suffered from seasickness. Twain felt horrible that Suzy died fighting a three-week battle with spinal meningitis without her mom by her side. Suzy and Livy were best friends and loved each other dearly.

Poor Financial Decisions and Tragedy

Twain was in Europe working because of his bankruptcy and he felt his poor financial decisions caused this tragedy. His wife Livy died at the age of 59 in 1904 due to congestive heart failure. His youngest daughter Jean died at the age of 29 in 1909 on Christmas Eve while at Twain’s house. She had an epileptic seizure while taking a bath in the early morning. Twain yearned for the arrival of death and lamented the instances where unexpected circumstances spared his life. He defied expectations by surviving into childhood despite being born prematurely and frail. Before learning to swim, he narrowly escaped drowning on nine occasions. Amusingly he remarked on being mistaken for a cat. He also faced 3 brushes with death due to various diseases that claimed the lives of children in his village. Through sheer luck, he narrowly evaded a tragic accident involving his brother’s steamboat, having been relocated just a day earlier. Twain’s life is replete with stories and circumstances where he remarkably eluded death by a hair. In 1909 Twain said this: “I came in with Halley’s Comet in 1835. It is coming again next year, and I expect to go out with it. It will be the greatest disappointment of my life if I don’t go out with Halley’s Comet. The Almighty has said, no doubt: ‘Now here are these two unaccountable freaks; they came in together, they must go out together.” His words would ring true one year later when he died on the night of Haley’s comet’s passing.

Twain Humanized Victims of Slavery

Over Twain’s life of travel, writings and reflections; he became one of the greatest humanitarians. He was also a powerful advocate for African Americans and other marginalized people. He was the first American author who humanized victims of slavery in his masterpiece book Adventures of Huckleberry Finn. This book undoubtedly exposed the masses to the atrocities committed against the African race and sounded the alarm for social justice in its time. In his masterpiece, he wrote in 7 different dialects and is the only person who recorded the dialect of the African slave in America. The most popular book in Twain’s lifetime was The Innocents Abroad or The New Pilgrim’s Progress published in 1869. This book gives a revelation as to Twain’s evolution with this text: “Travel is fatal to prejudice, bigotry, and narrow-mindedness, and many of our people need it sorely on these accounts. Broad, wholesome, charitable views of men and things cannot be acquired by vegetating in one little corner of the earth all one’s lifetime.”

His Personal Investment in Education

Twain provided financial assistance for the education of African Americans. In 1885, Twain published Huck Finn in New York. During that year, he privately wrote a letter to a law school dean expressing his sentiments, stating, “I do not believe I would willingly assist a white student who seeks charity from a stranger, but my stance differs when it comes to individuals of other races.” We have ground the manhood out of them, and the shame is ours, not theirs; and we should pay for it.” Twain was also a benefactor and friend of Helen Keller. “He treated me not as a freak, but as a person dealing with great difficulties.” While Mark Twain’s highest level of education was the 5th grade, he received honorary doctorates from Yale, Oxford, and Mizzou. Twain strongly believed in education for our society.  “Every time you stop a school, you will have to build a jail. What you gain at one end you lose at the other. It’s like feeding a dog on his own tail. It won’t fatten the dog.”

Importance of Ergonomics Education

One important aspect of ergonomics is education, whether it be a purely preventative measure in a group class or it is an individual early intervention case. In A Connecticut Yankee in King Arthur’s Court (1889), Twain writes this: “In the stillness and darkness, realization soon began to supplement knowledge. The mere knowledge of a fact is pale; but when you come to realize your fact, it takes on color. It is all the difference between hearing of a man being stabbed to the heart, and seeing it done.” When we educate people, there is a distinct difference between a worker knowing something and realizing it. Most workers know that they should use proper body mechanics and postures. They also perform appropriate warm up exercises using the correct equipment and ask for help when needed. How many times do we see workers that know this, but do not realize it! Once a person feels the pain and suffering of a strain or sprain, then they realize what they had already known. This is why prevention can be so difficult and early intervention is a more realistic approach to ergonomics. This is also why we do a lot of hands-on kinesthetic learning techniques in our worker education.

The Heritage We Share

I feel a deep honor to share a similar heritage as Mark Twain. I also feel privileged to be the founder and chairman of Peak Ergonomics, Inc. We are the largest ergonomics consulting business in Missouri and serve over 50 communities in the Show Me State. Our team works diligently and continuously to develop and deliver comprehensive cutting edge protocols to our clients. This year, our family has established a Mark Twain sanctuary in Hannibal, MO, which we rent out on Airbnb and has been cherished by more than 20 families. It is important to me that Mark Twain’s history, along with his impact, continue to spread.

An article by Paul Krewson, Founder & Chairman of Peak Ergonomics, Inc.

Healthy Hand Solutions

Prevention and First Aid for Common Hand Problems

Work:

Perform your work activity so that your wrists stay as straight as possible. Avoid putting pressure or contact stress at the middle bottom of your palm or the base of your fingers. If you are doing a lot of repetitive work with that hand, then try using the other hand more often. Minimize forceful gripping and pinching as much as possible. Power tools should have a diameter of 1.5″ and pinch tools should have a diameter of 0.5″ with good friction. If you are exposed to vibration or contact stress, then use a padded sleeve.

Sleeping:

Awkward sleeping posture can cause hand disorders. Sleep in a wrist splint to protect hand and wrist while sleeping.
Ice: Apply cold gel sleeve to wrist/hand for 20 minutes after hand-intensive work.

Driving:

Over-gripping the steering wheel, bearing weight down into the steering wheel or resting your hand on the gear shifter for more than a few minutes can decrease proper circulation. Gently maintain your grasp of the steering wheel and change hand position every few minutes.

Hobbies:

Hand intensive hobbies like playing the guitar, sewing or video gaming should be kept to a minimum if you also perform hand-intensive work.
Healthy Lifestyle: Nicotine and caffeine cause blood vessels to constrict which reduces blood flow into the hand. One cigarette restricts blood flow to the hand for one hour. The more fat that is inside a person’s body, the less space there is inside the wrist. Thirty minutes of walking per day and healthy weight control will greatly help. Avoid high salt intake, which causes fluid retention. Diabetes, high blood pressure, hypothyroidism, and many other diseases contribute to hand problems.

One-Leg Standing

One-Leg Standing  |  Early Intervention Ergonomics

What is the One-Leg Standing Exercise?

The one-leg standing exercise, also known as the single-leg stance, is a balance exercise that involves standing on one leg while maintaining stability. It is a simple yet effective exercise that helps improve balance, coordination, and overall lower body strength.

To perform the one-leg standing exercise, follow these steps:

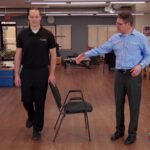
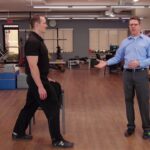
  1. IMPORTANT: In order to maintain safety, make sure to use a sturdy chair or countertop to lightly hold onto during this exercise in order to maintain your balance.
  2. Stand tall with your feet shoulder-width apart and arms by your sides.
  3. Choose one leg to start with and slightly lift the other leg off the ground, bending it at the knee.
  4. Find a focal point in front of you and focus your gaze on it to help maintain balance.
  5. Engage your core muscles and maintain an upright posture throughout the exercise.
  6. Hold this position for about 60 seconds.

Remember to perform the exercise on both legs to ensure balance development on both sides of the body.

Early Intervention Benefits

The one-leg standing exercise, offers several early intervention benefits, primarily focusing on balance, stability, and lower body strength. Here are some of the key benefits:

  • Balance improvement: Performing the single-leg stance challenges your body’s ability to maintain stability on one leg. By practicing this exercise regularly, you can enhance your balance and proprioception, which is your body’s awareness of its position in space. Improved balance is essential for daily activities, sports performance, and fall prevention, particularly for older adults.
  • Core muscle activation: Balancing on one leg requires significant engagement of the core muscles, including the abdominal muscles, lower back muscles, and hip stabilizers. These muscles work together to maintain a stable and upright posture during the exercise. Over time, this can lead to improved core strength and stability.
  • Lower body strength development: The single-leg stance targets the muscles in the standing leg, including the quadriceps, hamstrings, glutes, and calf muscles. These muscles are responsible for maintaining the position and supporting your body weight during the exercise. By regularly performing the single-leg stance, you can strengthen these muscles, which can improve overall lower body strength and stability.
  • Injury prevention: Strengthening the muscles involved in balance and stability can help reduce the risk of falls and injuries, particularly in activities that require single-leg support, such as running, jumping, and changing directions quickly. By practicing the single-leg stance, you can improve your body’s ability to handle the demands of these activities, decreasing the likelihood of accidents.
  • Rehabilitation and injury recovery: The single-leg stance is often used in physical therapy and rehabilitation programs to help individuals recover from lower body injuries, such as ankle sprains or knee injuries. By gradually reintroducing weight-bearing and challenging balance, the exercise aids in restoring stability, strength, and confidence in the injured limb.

Things to Remember

As with any exercise, it’s important to listen to your body and avoid pushing beyond your limits. If you have any concerns or pre-existing medical conditions, it’s recommended to consult with a healthcare professional before starting a new exercise routine.

It’s important to note that individual results may vary, and it’s always recommended to consult with a healthcare professional or a qualified fitness trainer before starting any new exercise program, especially if you have pre-existing medical conditions or concerns. They can provide personalized guidance and adapt the exercise to your specific needs and abilities.

These early intervention exercises are to improve overall health and fitness as well as reduce work-related injuries.
Remember: If you have an injury or illness, consult with a health care professional before attempting.

More Tools & Resources from Peak Ergonomics
Contact Us About Reducing Workplace Injuries
Healthy Employees are the Bottom Line! – Learn More!
Single-leg standing can strengthen the muscles involved in balance and stability which in turn will help reduce the risk of falls and injuries


Seated Plantar Fascia Stretch

Seated Plantar Fascia Stretch for Healthy Feet

What is the Seated Plantar Fascia Stretch?

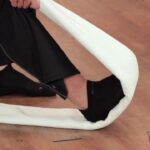
The Seated Plantar Fascia Stretch is an exercise that can help to stretch and loosen the plantar fascia, a thick band of tissue that runs along the bottom of your foot. To perform this stretch, sit on a chair and take a towel and lay it lengthwise on the ground. Next, place your right heel on the towel and wrap the towel lengthwise around the bottom of the foot. Gently pull your toes back towards your shin allowing the ankle to bend up towards you until you feel a stretch in the arch of your foot. Hold the stretch for 3 to 5 seconds before releasing then relax. Repeat this exercise on the left foot.

Early Intervention Benefits of this Stretch

The seated plantar fascia stretch can provide a range of early intervention benefits for your feet and overall health. By stretching the plantar fascia, this exercise can help to alleviate pain and discomfort caused by conditions such as plantar fasciitis. Additionally, it can improve the flexibility and range of motion in your feet, which may reduce the risk of injuries.

Performing this stretch regularly can also help to increase blood flow and circulation to the feet. This can improve the delivery of oxygen and nutrients to the muscles and tissues, which can aid in the healing process and promote overall foot health.

Furthermore, incorporating this stretch into your routine can help to reduce stiffness and tightness in your feet and lower legs. It can also improve your balance and stability, which can be beneficial for daily activities and sports performance.

If you have an injury or illness, consult with a health care professional before attempting.

These early intervention exercises are to improve overall health and fitness.

More Tools & Resources from Peak Ergonomics
Contact Us About Reducing Workplace Injuries
Healthy Employees are the Bottom Line! – Learn More!

The seated plantar fascia stretch can improve the flexibility and range of motion in your feet, which may reduce the risk of injuries.


Calf Stretch

Calf Stretch  |  Early Intervention Ergonomics

What is the Calf Stretch?

The calf stretch is a simple stretching exercise that targets the calf muscles. It is important to have something to support your balance during this stretch to ensure stability and prevent falls. Here are the instructions for performing the calf stretch:

  1. Find a sturdy wall, chair, or any elevated surface that can provide support.
  2. Step forward with the left leg, keeping the back leg straight and the heel flat on the ground.
  3. Make sure that your toes are pointed straightforward like you’re on skis.
  4. While keeping your back straight and core engaged, shift your weight forward onto the front leg and slowly lean forward, maintaining contact with the support.
  5. Continue leaning forward until you feel a gentle stretch in your calf muscle. You should feel the stretch along the back of your lower leg.
  6. Hold the stretch for about 3-5 seconds, focusing on maintaining your balance and feeling a comfortable stretch. Breathe deeply and relax into the stretch.
  7. After the desired duration, gradually return to the starting position by pushing through the support and bringing your body back upright.
  8. Repeat the stretch with the right leg forward and repeat steps 1-7.

Perform the standing calf stretch to give your body a rest when performing activities involving lifting, carrying, foot pedal use, prolonged standing, or prolonged walking.

Early Intervention Benefits

The standing calf stretch offers several early intervention benefits. Here are some of them:

Health Benefits:
  • Improved Flexibility: The standing calf stretch targets the calf muscles, specifically the gastrocnemius and soleus. Regularly performing this stretch can increase the flexibility of these muscles, allowing for better range of motion in ankle movements and overall lower body flexibility.
  • Enhanced Muscle Function: Stretching the calf muscles helps improve their elasticity and promotes better muscle function. This can lead to improved performance in workplace activities that involve lifting, carrying, foot pedal use, prolonged standing, or prolonged walking.
  • Reduced Muscle Tension: Tight calf muscles can contribute to muscle tension and discomfort. By regularly stretching the calves, you can help alleviate muscle tightness and reduce the risk of cramping and discomfort in the lower legs.
Injury Prevention Benefits:
  • Decreased Risk of Calf Strains: Stretching the calf muscles before engaging in physical activities can help reduce the risk of calf strains. This is especially important for activities that involve sudden bursts of speed or jumping.
  • Improved Ankle Stability: The standing calf stretch also targets the Achilles tendon, which plays a crucial role in ankle stability. By stretching the calf muscles and promoting flexibility in the Achilles tendon, you can improve ankle stability and reduce the likelihood of ankle sprains.
  • Balanced Lower Body Mechanics: Tight calf muscles can alter lower body mechanics, leading to compensatory movements and increased stress on other muscles and joints. Regularly stretching the calves helps maintain proper muscle balance, which can reduce the risk of imbalances and associated injuries.
  • Injury Rehabilitation: The standing calf stretch is also beneficial during injury rehabilitation, particularly for calf strains or Achilles tendonitis. Gradually incorporating this stretch into a rehabilitation program can aid in recovery and prevent future injuries.

Things to Remember

Remember to never bounce or force the stretch beyond your comfort zone, as it may lead to injury. Having a stable support, such as a wall or sturdy chair, ensures that you can maintain balance throughout the exercise and perform the stretch safely. If you have any specific concerns or pre-existing conditions, it’s advisable to consult with a qualified healthcare professional before starting any new stretching routine. These early intervention exercises are to improve overall health & fitness as well as help reduce work-related injuries.

If you have an injury or illness, consult with a health care professional before attempting.

Contact us for more information on how we can help your employees stay safe.

Resources

More Tools & Resources from Peak Ergonomics
Contact Us About Reducing Workplace Injuries
Healthy Employees are the Bottom Line! – Learn More!

Calf stretch leads to improved work-related activities involving lifting, carrying, foot pedal use & prolonged standing and walking.


Quadruped Thoracic Rotation

Quadruped Thoracic Rotation  |  Early Intervention Ergonomics

What is the Quadruped Thoracic Rotation Exercise?

The quadruped thoracic rotation exercise is a movement that targets and mobilizes the thoracic spine, which is the middle portion of the spine located between the cervical (neck) and lumbar (lower back) regions. This exercise is commonly used in many exercise routines to improve thoracic mobility, increase range of motion, and reduce stiffness or pain in the upper back.

Here’s how to perform the quadruped thoracic rotation exercise:

  1. Start by positioning yourself on all fours (quadruped position) on an exercise mat or the floor. Your hands should be directly under your shoulders, and your knees under your hips.
  2. Ensure your back is in a neutral position, with a slight natural curve in your lower back.
  3. Place one hand behind your head, with your elbow pointing out to the side. This will be your starting position.
  4. Slowly rotate your upper body by leading with your elbow. Focus on rotating through your thoracic spine while keeping your hips and lower back stable. Avoid twisting or excessively arching your lower back.
  5. Continue the rotation until you feel a stretch or mild tension in your upper back and shoulder area.
  6. Hold the end position for a few seconds, maintaining control and feeling the stretch.
  7. Return to the starting position by rotating back to neutral, and then repeat the movement on the opposite side.
  8. Perform the exercise for the desired number of repetitions or as recommended by your trainer or therapist.

It’s important to note that if you have any existing back or shoulder injuries or conditions, it’s recommended to consult with a healthcare professional or a qualified fitness trainer before attempting this exercise. They can provide personalized guidance and adapt the exercise to your specific needs and capabilities.

Early Intervention Benefits of this Exercise

The Quadruped Thoracic Rotation exercise offers several early intervention health benefits for the body. Here are some of the advantages:

  • Improved Thoracic Mobility: This exercise specifically targets the thoracic spine, helping to increase its mobility and range of motion. The thoracic spine is designed to rotate, and this exercise promotes better movement in that area, which can alleviate stiffness and improve overall spinal function.
  • Increased Spinal Flexibility: By actively rotating the upper body while maintaining stability in the lower back and hips, the exercise promotes flexibility and suppleness in the spine. Improved spinal flexibility can contribute to better posture and reduced risk of injuries.
  • Enhanced Core Stability: The Quadruped Thoracic Rotation exercise engages the muscles of the core, including the abdominals, obliques, and spinal stabilizers. These muscles work to maintain stability in the torso while the upper body rotates, improving core strength and stability.
  • Improved Shoulder Mobility: As the exercise involves rotating the upper body and reaching with the arm, it helps to enhance shoulder mobility and flexibility. It can be particularly beneficial for individuals who spend extended periods in seated positions or those involved in activities that require repetitive shoulder movements.
  • Posture Correction: Regularly performing this exercise can assist in correcting poor posture, particularly rounded or slouched shoulders. By mobilizing and strengthening the thoracic spine, it helps to counteract the effects of sedentary lifestyles and desk-bound work.
  • Reduce Injuries: A mobile and flexible thoracic spine can help distribute forces evenly throughout the spine, reducing the risk of strain or injury. By incorporating the Quadruped Thoracic Rotation exercise into your routine, you can promote better spinal health and minimize the likelihood of back or shoulder issues.

These early intervention exercises are to improve overall health and fitness and help reduce work-related injuries.
If you have an injury or illness, consult with a health care professional before attempting.

More Tools & Resources from Peak Ergonomics
Contact Us About Reducing Workplace Injuries
Healthy Employees are the Bottom Line! – Learn More!

Quadruped Thoracic Rotation will help increase range of motion, and reduce stiffness or pain in the upper back.


Upper Trapezius Stretch

Upper Trapezius Stretch

What is the Upper Trapezius Stretch?

The upper trapezius stretch is an exercise that targets the upper portion of the trapezius muscle, which is located in the upper back and neck area. This muscle can become tight and tense due to poor posture, stress, and other factors, leading to discomfort and pain.

To perform the upper trapezius stretch, follow these steps:

  • Sit or stand with your back straight and your shoulders relaxed.
  • Tilt your head to one side, bringing your ear towards your shoulder.
  • Place your hand on the opposite side of your head and gently apply pressure, increasing the stretch.
  • Hold the stretch for 3-5 seconds, then release.
  • Repeat on the other side.

It’s important to perform this stretch gently and gradually, without overstretching or causing pain. You can repeat the stretch several times throughout the day to help alleviate tension in your upper back and neck.

Early Intervention Benefits of this stretch

The upper trapezius stretch provides a range of health benefits, including:

  • Relieving neck and shoulder tension: Tightness in the upper trapezius muscle can lead to discomfort and pain in the neck and shoulder area. Stretching this muscle can help alleviate tension and improve range of motion.
  • Reducing headaches: Tension headaches can be caused by tightness in the neck and shoulder muscles. Stretching the upper trapezius muscle can help reduce the frequency and intensity of tension headaches.
  • Improving posture: Poor posture can cause tension in the upper trapezius muscle. Stretching this muscle can help improve posture, reducing the risk of back and neck pain in the long term.
  • Enhancing athletic performance: A flexible and relaxed upper trapezius muscle can help improve mobility and range of motion, enhancing athletic performance and reducing the risk of injury.
  • Promoting relaxation: Stretching the upper trapezius muscle can help promote relaxation and reduce stress, which can have a positive impact on overall health and well-being.

Overall, the upper trapezius stretch is a simple and effective exercise that can provide numerous health benefits for people of all ages and fitness levels.

These Early Intervention exercises are to improve health and fitness.
If you have an injury or illness, consult with a health care professional before attempting.

More Tools & Resources from Peak Ergonomics
Contact Us About Reducing Workplace Injuries
Healthy Employees are the Bottom Line! – Learn More!

The upper trapezius stretch is an exercise that targets the upper portion of the trapezius muscle, which is located in the upper back and neck area.


Straight Leg Raises

Straight Leg Raises

What are Straight Leg Raises?

As a targeted exercise, straight leg raises focus on the muscles in the lower abdominal and thigh areas. To perform this exercise, one must lie on their back with their legs straight, and lift one leg towards the ceiling while maintaining contact between the other leg and the lower back with the floor.

To perform a straight leg raise:

  1. Lie flat on your back with your arms by your sides and your legs straight.
  2. Tighten your abdominal muscles and press your lower back into the floor.
  3. Lift one leg slowly off the floor, keeping it straight and your knee locked. Lift the leg to a height of about 45 degrees.
  4. After holding the position for a few seconds, it is recommended to slowly lower your leg back to the starting position.
  5. Repeat the exercise with the other leg.

Early Intervention Benefits of this Exercise

Straight leg raises provide several Early Intervention health benefits, including:

  1. Strengthening the lower abdominal muscles: By engaging the muscles in the lower abdominal area, such as the rectus abdominis and transverse abdominis, this exercise can significantly improve core strength and stability.
  2. Strengthening the quadriceps muscles: Performing this exercise can also engage the quadriceps muscles, which are important for knee stability and injury prevention. By strengthening these muscles, the risk of knee injuries can be reduced.
  3. Improving hip flexor flexibility: This exercise can help to improve flexibility in the hip flexor muscles, which can become tight and shortened with prolonged sitting or inactivity.
  4. Improving balance and coordination: Performing straight leg raises can improve balance and coordination, as this exercise requires these skills. With regular practice, it is possible to see improvements in both balance and coordination.
  5. Rehabilitation after injury or surgery: You can do this as a rehabilitation exercise, particularly for regaining strength and flexibility after injury or surgery to the lower body.

Adding straight leg raises to your fitness routine can have numerous benefits. Firstly, it can improve core strength, lower body strength, and flexibility. Additionally, it can enhance balance and coordination. Ultimately, these benefits contribute to an overall improvement in physical fitness.

This Early Intervention exercise promotes strength for the hips and abdomen.

These Early Intervention Exercises are to improve health and fitness.
Before attempting any of these exercises, it is important to consult with a healthcare professional if you have an injury or illness.

More Tools & Resources from Peak Ergonomics
Contact Us About Reducing Workplace Injuries
Healthy Employees are the Bottom Line! – Learn More!

Straight leg raises can help to improve flexibility in the hip flexor muscles, which can become tight and shortened with prolonged sitting or inactivity.


Shoulder Band Strengthening

Shoulder Band Strengthening for Healthy Shoulders & Upper Back

What is the Shoulder Band Strengthening Exercise?

The Shoulder Band Strengthening exercise is a highly effective resistance band exercise that targets the shoulder and upper back muscles. Moreover, it is suitable for people of all fitness levels and is especially beneficial for those recovering from shoulder joint injuries or surgeries.

To perform this exercise, begin by standing with your feet shoulder-width apart and gripping the resistance band with both hands while your arms are extended in front of you. Additionally, keeping your shoulders down and back, slowly pull the band towards your chest, keeping your elbows close to your body and squeezing your shoulder blades together. Hold the position for a few seconds before slowly releasing the tension on the band and returning to the starting position. Repeat for 10-12 repetitions, making sure to maintain tension on the band throughout the exercise and avoid jerky movements.

The Shoulder Band Strengthening Exercise improves shoulder stability, posture, and overall upper body strength. Incorporating this exercise into your regular workout routine can yield significant results.

Early Intervention Benefits of this Exercise

The Shoulder Band Strengthening Exercise is an effective workout that offers numerous early intervention and health benefits, particularly for individuals looking to enhance their upper body strength and stability. Here are some of the top benefits of this exercise:

  1. Strengthens Shoulder and Upper Back Muscles: The Shoulder Band Strengthening Exercise is an excellent workout that targets the muscles in the shoulders and upper back. Specifically, this exercise focuses on the rotator cuff muscles, which are essential for shoulder stability. By performing this exercise regularly, you can strengthen your shoulder and upper back muscles, including the rotator cuff muscles.
  2. Improves Posture: By regularly performing this exercise, you can improve your posture by strengthening the muscles that support the shoulders and upper back.
  3. Prevents Shoulder Injuries: Strong shoulder and upper back muscles can help prevent injuries to the shoulder joint and surrounding muscles, making this exercise an excellent option for individuals recovering from a shoulder injury or surgery.
  4. Increases Upper Body Strength: Regularly incorporating this exercise into your workout routine can increase your upper body strength, making it easier to perform daily tasks that involve lifting or carrying objects.
  5. Enhances Athletic Performance: Strong shoulders and upper back muscles are crucial for many sports, such as swimming, tennis, and basketball. The Shoulder Band Strengthening Exercise can help improve athletic performance in these and other activities.

By performing the Shoulder Band Strengthening Exercise regularly, you can enjoy these and other health benefits, making it a valuable addition to any fitness routine.

These early intervention exercises are to improve health and fitness.
If you have an injury or illness, consult with a health care professional before attempting.

More Tools & Resources from Peak Ergonomics
Contact Us About Reducing Workplace Injuries
Healthy Employees are the Bottom Line! – Learn More!

The Shoulder Band Strengthening Exercise is an effective workout that offers numerous health benefits, particularly for individuals looking to enhance their upper body strength and stability.


Quad Stretch

Quad Stretch  |  Early Intervention Ergonomics

What is the Quad Stretch?

The quad stretch targets the muscles at the front of your thigh, known as the quadriceps. It is typically performed to increase flexibility and improve the range of motion in the hip and knee joints. This is an excellent stretch that replenishes nutrients and re-oxygenates the quadriceps muscles in the lower extremity. Perform this stretch to give your body a rest when performing activities that involve lifting, carrying, foot pedal use, prolonged standing or prolonged walking.

Here’s how you can do a basic standing quad stretch:

  1. Stand upright with your feet hip-width apart.
  2. It is important to hold onto a stable object such as a wall or chair for balance.
  3. Shift your weight onto your left leg and slightly bend your left knee.
  4. Reach back with your right hand and grasp your right foot or ankle (grab your pants leg if needed).
  5. Gently pull your right foot toward your glutes (but avoid excessive force or discomfort).
  6. Maintain an upright posture, with your knees close together and pointing down.
  7. Hold the stretch for 3-5 seconds, while breathing deeply and keeping your core engaged.
  8. Release the stretch and repeat on the other side by shifting your weight onto your right leg and stretching your left quad.

Remember, it’s important to warm up before performing any stretches or exercises to prevent injury. If you have any pre-existing conditions or concerns, it’s recommended to consult with a healthcare professional or a certified fitness trainer before starting any new exercise routine.

Early Intervention Benefits of this Stretch

Performing this stretch regularly can provide several early intervention health benefits, including:

  • Improved flexibility: The quad stretch helps increase the flexibility and range of motion in the hip and knee joints. This can be beneficial for activities that require kicking, running, squatting, or any movement that involves bending the knees.
  • Improved work activity performance: Having flexible quadriceps can improve your work performance in various activities. It allows for better leg extension and power generation, which can enhance lifting, walking, jumping, and overall lower body strength.
  • Injury prevention: Flexible quadriceps can help prevent injuries, particularly in the knee and hip joints. By maintaining good flexibility, you reduce the risk of strains, sprains, and other muscular imbalances that can occur during work-related activities.
  • Reduced muscle tension and tightness: Stretching the quadriceps can help relieve muscle tension and tightness that may develop due to prolonged sitting, sedentary lifestyles, or intense workouts. It promotes blood flow to the muscles, which can help reduce muscle soreness and promote relaxation.
  • Improved posture: Tight quadriceps can contribute to poor posture, as they can pull the pelvis forward and create muscle imbalances. Regularly stretching the quads can help lengthen these muscles, promoting better alignment and posture.
  • Back pain relief: Tight quadriceps can indirectly contribute to lower back pain by affecting the alignment of the pelvis and the muscles around the hips. By stretching the quads, you can alleviate tension in the hip flexors and potentially reduce back pain.

Remember, individual results may vary, and it’s essential to listen to your body. If you have any specific health concerns or conditions, consult with a healthcare professional or a certified fitness trainer before starting any new exercise routine. If you have an injury or illness, consult with a health care professional before attempting.

These early intervention exercises are to improve overall health and fitness and help reduce injuries.

More Tools & Resources from Peak Ergonomics
Contact Us About Reducing Workplace Injuries
Healthy Employees are the Bottom Line! – Learn More!

Quad Stretch provides flexibility which in turn can reduce injury while performing work-related tasks that involve lifting or walking.


Active Flexor Tendon Stretch

Active Flexor Tendon Stretch | Early Intervention Ergonomics

What is the Active Flexor Tendon Stretch?

This is an excellent stretch to replenish nutrients and re-oxygenate the distal upper extremity. This composite stretch originates at the common wrist flexor tendon of the medial epicondyle. It pulls all the way down to the deep and superficial tendons that pass through the annular pulleys of the fingers. Perform this stretch to give your body rest when performing forceful gripping, repetitive gripping, awkward or sustained postures of the elbow, forearm, wrist, and hand. Also, used to prevent common disorders such as golfer’s elbow, carpal tunnel syndrome, trigger finger, tendinitis, tendinosis, and muscle strain.

Active flexor tendon stretch is a type of stretching exercise that targets the flexor tendons in the hands and wrists. This stretch involves extending the arm with the palm facing down. Then use the other hand to gently pull the fingers back towards the wrist until you feel a stretch in the palm and wrist area.

Early Intervention Benefits

The early intervention benefits of doing the active flexor tendon stretch include:

  • Improved flexibility and range of motion in the hand and wrist. This can be particularly beneficial for athletes, musicians, and individuals who perform repetitive hand and wrist movements.
  • Increased circulation to the hand and wrist area, which can help to reduce pain and stiffness.
  • Reduced risk of developing conditions such as carpal tunnel syndrome, tendonitis, and other hand and wrist injuries.
  • Improved grip strength, which can be helpful for individuals who perform tasks that require a strong grip, such as weightlifting, manual labor, or rock climbing.

Things to Remember

Overall, incorporating the active flexor tendon stretch into your regular exercise routine can help to improve your life. More specifically, the health and function of your hands and wrists, reduce the risk of injury, and enhance your overall physical performance. However, it’s important to consult with a healthcare professional before starting any new exercise program. This is especially important if you have a history of hand or wrist injuries or medical conditions.

If you experience any pain or discomfort during the stretch or have specific concerns, it’s advisable to consult with a healthcare professional for guidance tailored to your individual needs.

These early intervention exercises are to improve overall health & fitness as well as help reduce work-related injuries.

If you have an injury or illness, consult with a health care professional before attempting.

Contact us for more information on how we can help your employees stay safe. Healthy Employees ARE the Bottom Line!

Resources

More Tools & Resources from Peak Ergonomics
Contact Us About Reducing Workplace Injuries
Healthy Employees are the Bottom Line! – Learn More!

Active Flexor Tendon Stretch to Reduce Work-Related Injuries to the Hand


The Applied Ergonomics Society